November at Plot 4

The weather this October has been really warm. As a result the allotment still has flowers blooming and on my last visit the ivy was awash with bees buzzing away.

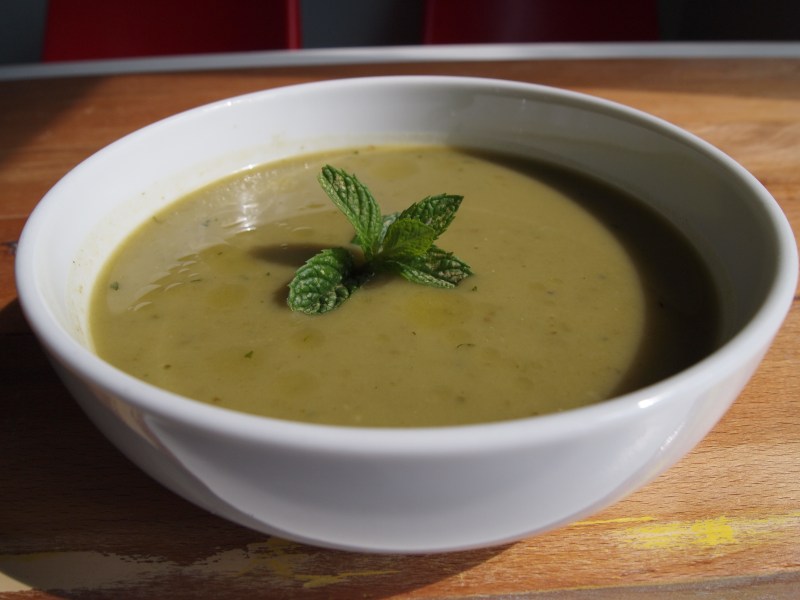
October has still offered produce to harvest. The last of the raspberries have now been devoured, or are left for the birds to feast on. Our apples this year haven’t been the best, so only a few of the later apple variety have been available to use in dishes like those in my favourite five apple recipes. The plus side of an apple crop which has fallen or rotted on the tree, is a bumper windfall for the birds, with thrushes, blackbirds and starlings all gorging themselves. We have managed to harvest the last of the pumpkins and squashes, using them in risottos, cakes and to accompany many dishes. The Jerusalem artichokes are starting to be dug too. I love the nutty taste they bring to dishes, such as this Jerusalem artichoke purée. The Swiss chard is also looking resplendent in the autumnal sunshine, and has been a great addition to the kitchen too.

This time of year is great for planting out onions and garlic for overwintering, and even broad beans, given the mild autumn we’ve had so far. I usually plant a crop of each of these at this time of year, then another sowing in the spring. This helps with the successional cropping next year, but also allows for different varieties to be grown easily, and utilises space which otherwise would be left bare.

November is the last chance to get a few jobs done, until the weather turns for the worse on a more regular basis. The leaves that have fallen all over the allotment need sweeping up in order to make leaf mould. Although leaf mould contains not many nutrients; it makes a great mulch which, with little further attention other than a little watering in dry periods in summer and the occasional turn, also makes a good addition to any compost. The birds will soon need a bit of help with food too, so I’ll be putting up some feeders and using the old sunflower heads to fill them with seeds. It will also be time to make another bird food wreath.

Garden share collective badge
This post is contributing to The Garden Share Collective; an international group of bloggers who share their vegetable patches, container gardens and the herbs they grow on their window sills.

How to make Nasturtium Capers

When we were in Sicily this summer, one of the ingredients which I found in the market of Ortigia was capers. The region, and especially the island of Pantelleria, is famous for these little preserved flower buds, and they appear in many of Sicily’s traditional dishes. I love the saltiness of them, the way they bring a real punch to dishes. Back here in the UK, we can get capers in the shops, but they’re not nearly as good as those from the Ortigian market.

We don’t have our own home grown capers; but the allotment is awash with nasturtiums, and the seeds of this butterfly-like flower can be brined and pickled in the same way as capers to produce a good home-grown alternative. Picked whilst still green, soaked in brine, and pickled in vinegar infused with allotment herbs; these nasturtium ‘capers’ can be used like their Sicilian cousins.

You will need (Makes 2 x 115g jars)
15g salt
100g nasturtium seed pods
A few peppercorns
A few herbs; I used fennel tips and a bay leaf or two
1 tsp sugar
200ml white wine vinegar

Make a brine by dissolving the salt in 300ml of water. Clean up the seeds, discarding any seeds which are yellow or brown, as these won’t be tender and full of flavour after pickling. Put the remaining seeds into a bowl and cover with the cold brine, before leaving for 24 hours. The next day drain the seed pods and dry well. Pack them into small, sterilised, jars with the peppercorns and herbs, leaving 1cm at the top so the vinegar will cover the seeds well. Bring the vinegar and sugar to the boil, then pour over the seeds and seal the jars with sterilised vinegar-proof lids. Store in a cool, dark place and leave for a few weeks before eating. Use within a year.

Nasturtium capers

October at Plot 4

September, with the start of the school year and my work to develop a local bakery in the heart of my community, has sped by. If I’m honest, I’ve neglected the plot a bit. I’ve been there a fair bit, but have been harvesting crops and just enjoying the space, rather than getting on with the jobs I should have been doing. Consequently, the start of October is necessarily going to be a busy one.


There is still a lot to harvest, the autumn fruiting raspberries are still going, as are the blackberries. The beetroot have been a great success and have been used in a range of dishes recently, including this delicious slaw. The squashes are also ripening nicely and I look forward to harvesting the first of the fruits in the next day or so. Squashes to me, are the archetypal autumn vegetable and also one of the most versatile one. They can be used roasted for gnocchi or pasta dishes, in soups, even in cupcakes. The last of tomatoes are ripening too, so I’ll be using these in various dishes, as well as preserving a few too.

At this time of year there is little to sow. I’ve sown a few rows of late lettuce, now that the days are a little shorter and the heat has diminished a little. I’ve got a number of brassica plants and leeks to plant out in the next day or so, although not sown myself they should bring a harvest later in the year.

The autumn tidy up is the main job this month. There’s paths to tidy, greenhouse to clean out, fences to fix, beds to be dug; the list goes on. With the cold weather coming towards the end of the month ahead, I’m also going to make sure I have enough firewood for the log burner. The allotment is a great place to spend time, and having a warm shed to pop into for a hot cup of tea, or just to warm up, makes being there and getting jobs done all the easier.

Garden share collective badge

This post is contributing to The Garden Share Collective; an international group of bloggers who share their vegetable patches, container gardens and the herbs they grow on their window sills.

September at Plot 4

August has seen some scorching weather, but also unseasonably cool and wet days. The slightly odd weather and the fact that we’ve been away for a decent portion of the month, has seen some super growth by veg and weeds alike.

August has offered much to harvest. The beetroot have swollen to a good size, and the French beans have been plentiful, giving us a load of different dishes, including a new found classic – tagliatelle with pesto, green beans and new potatoes. Last year’s cucumber monster has reared his head once more, and we have an ongoing supply of the coolest of vegetables. The soft fruit this year has been amazing; raspberries have followed on from the strawberries, and now we have a bumper crop of blackberries to devour. Our early apple tree has been laden with fruit for a while, but they have just become ripe and we are inundated in apples. The trouble with having an early variety of apple like Beauty of Bath is that they don’t store well, so I’ve been bottling and making to use them as well as I can.

A new row of salad is due to be sown in the next few days, and I will sow more  Cime di Rapa too, as the first few rows have been decimated by the weather, pests and (if I’m honest) a little neglect on my behalf. I’ve failed to prepare properly for the winter period, so may have to source some kale and other brassicas from somewhere to fill a gap or two. In the greenhouse the tomatoes, peppers and chillis are doing their own thing, but I’ll look to sow some salads as space becomes available.

As I mentioned, our trips away from home during August have resulted in a little wild growth, and as a result there are many jobs to do in September. One of the major jobs is to prepare ground for the autumn/winter growing period. Depending on my success in finding crops to pop in, or sow, this may also involve the sowing of green manures. I’ve had little success in the past with these, ending up on one occasion with a mass spreading of rye grass across a section of plot, and failing to remove it all properly. However, this year if I have space, I’m going to revitalise the ground with a green manure. Any ideas which work best?

Garden share collective badge

This post is contributing to The Garden Share Collective; an international group of bloggers who share their vegetable patches, container gardens and the herbs they grow on their window sills.

How to Make Fougasse

Originally cooked in the ashes of the hearth, and typical of Province, Fougasse is a marvellous bread to eat. It’s pretty simple to make too; combining olive oil with flour, yeast and salt. Traditionally the Fougasse was a flatbread made to check the temperature of the wood fired oven; the time taken for the bread to bake indicated how hot the oven was. That said, it doesn’t need to be cooked in a wood fired oven; a really hot traditional domestic oven is fine.

Fougasse

Fougasse is a great vehicle for flavours, and the allotment is good at providing them at the moment. The red onions, which have been busy swelling over the last few months, are dried and ready to be used; and the woody herbs at the plot are all looking lush and fragrant. So, to combine the flavours of rosemary and red onion, or marjoram and sea salt, makes sense to me. I always think if they grow together (the rosemary and onions look at each other over the allotment path), then they probably will work together in food.

You will need (makes 8)
1kg strong white flour
100g refreshed sourdough starter (this is optional, but adds a depth of flavour)
625ml warm water
100ml olive oil
10g dry yeast
15g salt

For the flavourings
1 red onion, finely sliced and fried until soft and succulent
1tsp. chopped rosemary
1tbsp. torn marjoram leaves
2tsp. sea salt

Mix all the ingredients into a loose dough, then leave to stand for 10 minutes to allow the flour to absorb the water and for gluten strands to begin to develop. Tip the mix onto a work surface, before kneading the dough until the dough comes off the work surface and has lost some of its stickiness. The dough will be sticky, but try not to add any extra flour; your bread will benefit from it if you don’t. Form the dough into a ball, place an oiled plastic sheet over it and leave for 90 minutes to 2 hours to ferment. Tip onto an oiled surface and stretch and fold the dough. Let it rest, covered once more, for a further half hour, the portion into 200g pieces. If including flavourings in the dough, flatten each piece and place a small amount of flavouring (cooked onion and finely chopped rosemary in my case), fold the dough over the filling and ball them up to rest again for a further 10 minutes. Roll out the balls of dough into rough triangular shapes. At this point you can add any toppings you want, gently pushing them into the dough with your fingers. Dust each triangle with flour, then use a sharp knife to cut slashes through the dough. Start with a slash down the middle, followed by diagonal slashes on each side of the centre to form a leaf-like effect. Carefully open the holes a little, stretching the dough as you do, before sliding onto a lined baking tray and baking in a hot oven for 10-12 minutes until golden brown.

Recipe inspired by those of Community Chef and Emmanuel Hadjiandrou.

fougasse


August at Plot 4

July seems to have whizzed by and the children are eagerly anticipating the summer holidays and a month of enjoying the great outdoors in the summer sun (well hopefully).

There continues to be much to harvest, with the last of the broad beans being enjoyed in salads and pasta dishes. The raspberries have been excellent and we have been able to pick a large punnet or so every other day. With so many raspberries in the kitchen, we’ve been using them in loads of dishes and have the prospect of more when the autumn varieties ripen. The yellow French beans have also started to crop in earnest, and the onions and shallots have been pulled and dried ready for use.

I’ve continued to sow salad and radishes and I’ve also been sowing crops for the winter ahead. Included in these has been Cime di Rapa, an Italian version of purple sprouting broccoli which I grew with success last year. The beetroot already growing is doing well, but there’s still time for one last row, and whilst I’m at it I’ll probably put in another row of Swiss chard. You can never have enough chard. With the autumn and winter in mind, some brassicas will also be going in. I think I’ve missed the boat in terms of sowing purple sprouting broccoli, but I think I’ll try and get some plants to plant out.

We, like many families, are going away during the summer holidays, so one of the jobs this month is to create some kind of drip irrigation system which allows the greenhouse tomatoes to stay watered during our break. The plan is to utilise the water butt beside the greenhouse and a piece of old hosepipe to dribble a little water into the plants over the period of our absence. Needless to say, I think we’ll need to still call on the kindness of allotment neighbours to keep an eye on the plot; not least because many of the crops will undoubtedly be ready for harvest whilst we’re enjoying the Sicilian sunshine.

Garden share collective badge

This post is contributing to The Garden Share Collective; an international group of bloggers who share their vegetable patches, container gardens and the herbs they grow on their window sills.

How to Make Vegetable Print Wrapping Paper – A Guest Post from Little Button Diaries

My friends, Little Button Diaries, are always making amazing things; whether its cakes, food like the rocket pest0 they guest posted last year, or super craft projects. All this, with children to look after too. I’m really pleased to be hosting one of their great crafty ideas, and with a raft of birthdays in the summer months, wrapping paper is always needed.

vegetable print wrapping paper

Vegetable Print Wrapping Paper

This is a quick and easy craft to which can add a personalised touch to wrapping and use up vegetables. We steered away from the potato to try different garden vegetables so we could experiment with design and texture. You can also get your little ones involved in the printing too.

For this project you will need:

  • Vegetables (we used an onion, peppers and carrots)
  • Acrylic Paint
  • Sponge
  • Brown packing paper

For Kids printing:

  • Baby-friendly paint

1. Begin by cutting a large piece of packing paper. We made ours a lot bigger than our present in case we made any mistakes.

2. Chop your vegetables leaving enough of a handle so you can stamp with it. We sliced the onion, carrot and pepper horizontally near the top.

vegetable printing tutorial vegetable printing tutorial

3. Using the sponge, dab the paint onto the vegetable to coat it. Then get stamping. We did one row of stamping then reapplied more paint. We experimented with different colours and veg to create a repeating pattern.

vegetable printing tutorial vegetable printing tutorial

4. To get your little ones involve swap acrylic paint for baby-friendly paint and let them get stuck in. Their design may be more abstract but they’ll enjoy getting messy!

vegetable printing wrapping paper

5. When you’re paper is full up leave to dry. We then wrapped our present with string and used a few sprigs of lavender from the garden to finish.

vegetable printing wrapping paper

For more craft and baking ideas visit our blog Little Button Diaries. You can also follow us on TwitterFacebookInstagram and Pinterest.

~ Laura & Tia xx ~

How to Make Lavender Shortbreads

An English summer afternoon is not a proper summer afternoon without afternoon tea, and afternoon tea is not afternoon tea without shortbread. The sweet biscuit works really well with the addition of a few lavender flowers. The floral notes of the lavender give the classic shortbread a scented twist. Based on the wonderful Mary Berry’s recipe in her timeless Fast Cakes, this is a real teatime treat. lavender

You will need

200g gluten-free plain flour
100g cornflour
200g butter
100g caster sugar
2 tsp. lavender flowers

Heat the oven to 160°C and grease a 20cm round, loose bottom, tin. Cream the butter and sugar, until light and fluffy. Sift the flour and cornflour together and combine with the lavender and the butter and sugar mix.. Knead together and press into the tin, before chilling for half an hour. Place in the preheated oven for 40 minutes, or until a pale golden colour. The gluten-free flour results in a paler finish to normal shortbread, so don’t expect a well browned shortbread. Remove from the oven and cut into wedges, leaving the shortbread to cool in the tin. Lift out onto a cooling rack and sprinkle with a little sugar.

Dealing with the June Drop – How to Make Mint Sauce

One of the most frustrating things about growing any crop is when, for the sake of improving the quality of yield, you have to remove fruits or seedlings. To me this seems to be wrong. I know thinning seedlings means that the plants that remain have more space to develop and grow healthily, but the very fact that I’ve nurtured them to that point means I feel a sense of attachment and of lost potential. That’s why, whenever I can, I use the thinnings in meals. When it comes to apples, nature, as if to ensure I don’t get lazy and just let things go, steps in with the ‘June Drop’. The annual time of year when the apple tree chooses to drop a few of the extra fruits, self regulating to give those fruit that remain the best chance of forming properly and going on to ripen to their potential.

I know its July, but the drop has only just happened in earnest and the apple trees at the plot have a scattering of undersized, under ripe, apples in the grass below. Unripe apples are not a culinary highlight of the year, but they do have one great asset. Pectin. Like the super-sour crab apple, these dropped fruits are full of pectin and when tempered with sugar they are also light on flavour. As such they can be used in preserves to produce a beautiful herb jelly. This month has also seen a mint infused takeover of the allotment. The ever invasive herb has spread its refreshing leaves between and beneath almost al of the top half of the plot. So in effort to capture the mintiness for later in the season when mint suffers in the baking heat, I made mint jelly. The perfect accompaniment to roast lamb, and infinitely better than the supermarket fluorescent green version.

mint jelly

You will need (makes  jars)
500g unripe apples (cooking apples would do the job if apples are actually in season)
1 bunch of mint
Granulated sugar
30ml white wine vinegar

Chop the apples roughly; if they are small, then just chop them in half. Add to a pan with the bunch of mint and enough water to barely cover the apples. Bring to the boil, then simmer for 45 minutes or so, until the fruit is very soft. Pour the contents into a scolded jelly bag and leave to drip overnight. Don’t be tempted to squeeze the bag, or poke it, as this will effect the clarity of your jelly.

straining the pulp

Measure the strained juice, before adding the sugar. For every 200ml of liquid you will need 150g of sugar. Return the liquid to the cleaned out pan, with the addition of the vinegar. Heat to boiling point, stirring to ensure the sugar is dissolved properly. Continue to boil for 10 minutes or so, until the setting point is reached. For this I use a jam thermometer and wait until the bubbling liquid gets to 104°C, before removing from the heat, skimming off the scum, and then pouring into warm, sterilised jars. Once sealed with a lid, the mint jelly will last up to a year. Not that it will last that time, as it’s an irresistible accompaniment to lamb.

mint jelly

Chilled Lettuce and Pea Pod Soup for Plot 22

We have been able to pick the first of our peas recently and enjoyed them as part of a broad bean and pea pasta dish. When I visited the local community allotment, Plot 22, earlier I noticed how well their peas were growing. So when asked by Emma to write something for their site I had to do something based on peas; well, based on pea pods actually.Pea Pods shelled of peas
Check out the rest of the post and the recipe I wrote for them below.

Chilled Pea Pod and Lettuce Soup
The process of picking and then podding peas is such a great one. It almost forces you to sit at the kitchen table and take time to pop out the sweet green orbs, occasionally failing to resist the temptation to eat a stray pea. However satisfying this is, you’re always left with a mountain of fresh pea pods[…]