Quick and Easy Christmas Pudding Ice-Cream with Poached Pears

After Christmas there is always food leftover. If I’m honest, I prefer the days after Christmas with the cold turkey and leftover bits of this and that, to the main event on Christmas Day. In our house there is organisation of meals before and during the 25th, but once we’ve had the turkey and trimmings hot all meal planning goes a bit by the way side. We eat leftovers for the next few days, with different accompaniments perhaps, but essentially the same for the next few meals. And, as I mentioned, I love it.

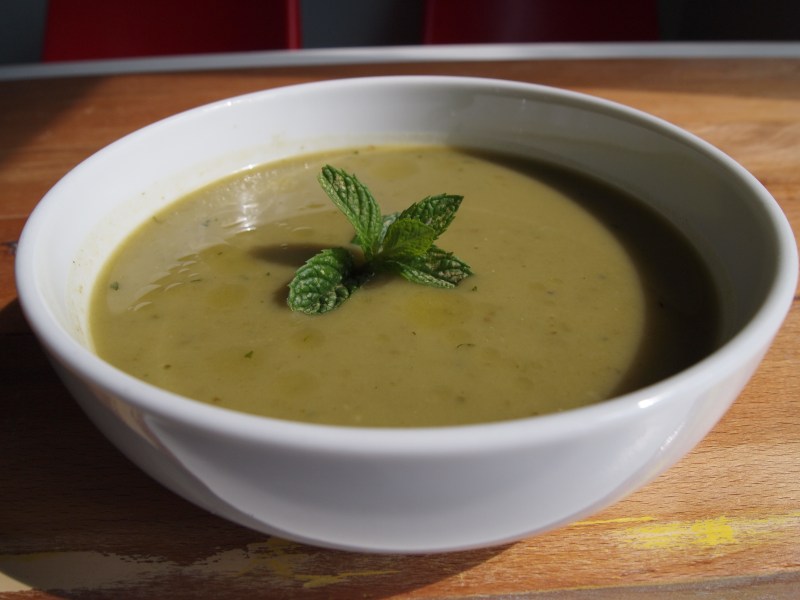
Christmas pudding is one of those things that is traditionally on the list of leftovers. It is after all a really heavy pudding, served after a massive roast dinner. Subsequently, only a small portion is consumed by everyone and there is a decent amount left over. It’s all right the next day reheated, and I know some people fry a slice in butter to give it a quick twist, but in ice-cream it’s a revelation. A cold pudding, on its own, or accompanying a poached pear like below, is what is needed sometimes.

There is little spare time at Christmas, so this is a super easy recipe. So easy in fact that it doesn’t warrant a recipe section on this post. Very basically its, get some vanilla ice cream, whizz it in the food processor to make it a little smoother, mix in some leftover Christmas pudding, and refreeze. Remember to get the ice cream out of the freezer with enough time for it to soften, and enjoy with anything or on its own. To make the poached pear below, see my previous pear inspired Favourite Five.

How to Make Recycled Metal Spoon Hooks

how to make recycled metal spoon hooks
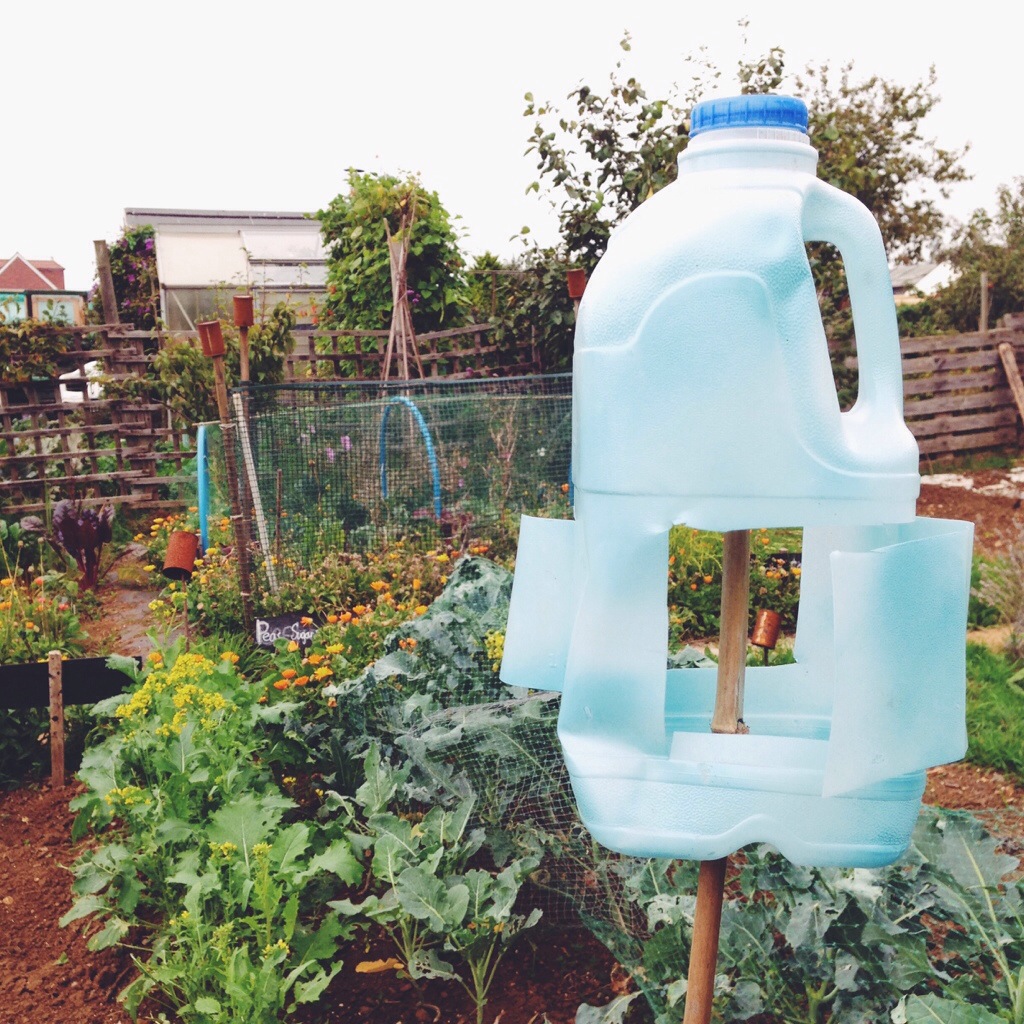
I like to not spend much money on the allotment. It’s not that I’m not committed to the plot; if we were ever to lose our little bit of land over the other side of the railway lines, I’d be devastated. I just feel that allotments are all about getting the best from very little. Allotmenteering should be about reusing, repurposing, recycling. So, when in need of hooks in the shed recently I was reluctant to nip down to Homebase and buy a hook or two. On a trip to the allotment I noticed some cutlery was being thrown out by a neighbour and procured a spoon or two, setting about making them into a couple of bespoke hooks. Indeed, on closer inspection (they were very dirty, so needed a clean) they revealed themselves as silver spoons!

The process of turning these unwanted spoons into hooks was very simple. After cleaning the cutlery, I drilled a couple of holes through the spoon part. They need two holes to ensure the spoon doesn’t spin round when heavy items are hooked on. Next step was to form the spoon into a hook shape. These spoons bent easily, so I just used my hands to form the correct shape; I suppose stronger metal might need the use of a vice or something similar. The final step was to screw the spoons into the shed wall and hang stuff up.


Courgette Sourdough Bruschetta

courgette sourdough bruschettaAs its Zero Waste Week, I thought I should post a quick recipe to use up the last slice or so of the loaf. I’ve been making more bread recently and we frequently end up with a few slices worth being left a little too long to be used for a sarnie. Real bread, that which is made of the simplest of ingredients, tends to not go mouldy, instead going stale first. This leads to it being perfect for a range of different uses as toast. One of my favourite at the moment is bruschetta. A great way to use up vegetables, as well as the bread. We’ve got a few courgettes still, so I used one to top my slice or two of leftover sourdough.

You will need (a snack for one)
2 slices of bread – I used sourdough, but any good bread would work.
1/2 clove garlic
1 tbsp. extra virgin olive oil
1 courgette
A little red chilli (finely chopped)
1 tsp. lemon juice
salt and pepper

Use a speed peeler to cut the courgette into long ribbons. Place the ribbons on a hot griddle and cook for a minute or so on each side, until they star to have charring on the courgette. Remove them from the griddle and place them in a bowl with the lemon juice, chilli, a little salt and pepper, and almost all of the oil. Allow the courgettes to absorb the flavours, whilst you toast the bread. When the toast is done, rub it with the garlic, drizzle a little oil on it, and top with the courgettes mix.

Chilled Lettuce and Pea Pod Soup for Plot 22

We have been able to pick the first of our peas recently and enjoyed them as part of a broad bean and pea pasta dish. When I visited the local community allotment, Plot 22, earlier I noticed how well their peas were growing. So when asked by Emma to write something for their site I had to do something based on peas; well, based on pea pods actually.Pea Pods shelled of peas
Check out the rest of the post and the recipe I wrote for them below.

Chilled Pea Pod and Lettuce Soup
The process of picking and then podding peas is such a great one. It almost forces you to sit at the kitchen table and take time to pop out the sweet green orbs, occasionally failing to resist the temptation to eat a stray pea. However satisfying this is, you’re always left with a mountain of fresh pea pods[…]

Wheelbarrow Planter

I’m always keeping my eyes open for different containers to grow crops in. Recently I’ve come across a couple of old wheelbarrows; abandoned and rusty, they are sad versions of their former working selves. They still serve a purpose though. They can hold soil, and as the bottoms are not rusted, a few drilled holes provide the necessary drainage. One of the wheelbarrows has been turned into a strawberry planter. Where once there were bricks and gravel, now there is lush green foliage, white flowers and the little green fruit of the developing strawberries. The berries are rapidly ripening and I had visions of being able to wheel the barrow around the plot, taking the fruit to whoever fancied the delight of picking fresh strawberries. Unfortunately, the weight of the soil, and the rusty wheel didn’t allow it. We’ll just have to go to the strawberries.

The other barrow has been sown with carrots. Its added height hopefully means that the dreaded carrot fly won’t detect the roots and damage the crop. I’ve sown little spherical Parisian carrots, so the lack of depth shouldn’t be a problem, and the fact it’s a container has allowed me to use a better draining soil (lots of sand imported) than the heavy clay we usually have. Now to find another wheelbarrow and see what I can put in it.

Peg Plant Labels

As the sown seed trays mount, knowing what is likely to emerge from them becomes increasingly useful. I’ve always used the standard white plastic type, writing on them with a Sharpie and cleaning it off each time I need to change the plant it marks. When clearing out a cupboard recently I found some old wooden clothes pegs. So, I decided to use some of my blackboard paint to convert them into plant markers. I like using natural materials, rather than plastic, whenever possible; the fact that I can move a marker to a different pot easily, or wash off the chalk writing is a bonus.

To make these plant markers is an easy process. Just paint the pegs with blackboard paint (I used a mix of dipping them in the paint and using a paintbrush), allow to dry, then write on them with a chalk pen.


There’s also still time to nominate the blog for Best Food Blog in the MAD parent blogger awards. To do so please go to http://www.the-mads.com/vote/ vote for a Best Blog of your choosing and then vote for Spade Fork Spoon as Best Food Blog. Thank you!

20140312-110850.jpg

Something From Nothing – Newspaper Pots

This time month is the time of year when gardeners and allotmenteers are starting to sow seeds ready for the season ahead. I’ve got loads of pots waiting at the allotment, but my seed trays have seen better days. I always try and spend the smallest amount of money I can at the allotment, so replacing a load of seed modules without having to buy new ones is desirable. A while ago we got a wooden seed pot maker; so armed with that and the newspapers from the weekend I set about creating some seed modules for my early sowings. Obviously using newspaper is great as it is always best to reuse rather than simply recycle. However, its other advantage is that seedlings can just be planted out in their paper modules; the newspaper will breakdown in the soil and allow roots to spread and establish. Its a little time consuming making loads of these, but the satisfaction in making something from a resource which would only be thrown away (well recycled) makes up for the extra effort.

You will need
Newspaper
Pot making mould (or something cylindrical in shape about the size of pot you require)
Compost

Start by cutting newspaper into 8cm strips (larger if cylinder mould being used is bigger, you need enough paper to fold underneath the tube to make the base).Wrap the newspaper strip around the mould and then press down on a hard surface to form a firm base. Once your pot is made, you can fill with compost and sow seeds, or plant out seedlings.

A Wood Burner and a Shed

Our new shed is installed. The old one survived the storm, but with cold and wet weather likely to feature over the next few months, we decided that a shed large enough to sit out weather in was needed. My brilliant allotment neighbour built me a 7’x8′ shed out of pallets (for a very reasonable fee) – it even has a reclaimed window in it to offer some light during the darker months. I have always felt that the allotment should be a place where we reuse and recycle and it really pleases me to know that the shed is constructed from such materials – I think we’ll continue that theme when insulating and decorating it.

20131031-162719.jpg
My other allotment neighbour persuaded us that we should also invest in a little wood burning stove for the shed. It’s a bit of an expense; but one thing I’ve learnt over six years of having an allotment and a family, is that if your children are happy and comfortable at the plot, then it means you can get lots done on your visits. Also, I find the allotment the place where I can relax the most, and I’ve been dreading not being able to visit due to the weather. Having the stove and a snug shed should help me to continue to enjoy the peace if he plot – whatever the weather and life throws at me.

20131105-203000.jpg

Got the Bottle?

20131003-125426.jpg Sometimes when watching TV it’s what the producers don’t intend you to focus on that’s the part that sticks. Watching Gardener’s World last week, I noticed a great reuse of plastic milk bottles. Like many of us with families we get through our fair share of the 2l bottles, and although we recycle them, I always think that there must be a good way to reuse them. At the plot we also have a problem with pigeons taking a liking to our brassicas, causing a serious dent in the rows of Cime di Rapa and Kale. So the chance viewing of wind operated bottle bird scarer got me thinking. Armed with a quick sketch from the TV screen I set about recreating them with our own pile of leftover bottles.

What you will need

Old 2l plastic milk bottles (with lid on)

Scissors Bamboo cane/stick

First you will need to make a hole in the middle of the base of the bottle. It needs to be slightly larger than the diameter of the stick or cane, so that it can spin around. The cutting of the flaps is the most crucial step (and one I got wrong repeatedly before finally succeeding). The flaps need to be cut so that they go around the edges of the bottle (this allows the wind to catch them better and turn the bottle). They also need to be cut so both flaps encourage the bottle to turn the same way (see the image above). Once the flaps are cut, fold back and out to maximise the cup size, and then place the whole bottle on the bamboo cane. I decided to lightly spray paint mine with the leftovers of some enamel paint, but other than that, that’s it. So far the winds haven’t been too strong and the bird scarers have been gentle rotating, but as the winds get up during the autumn they should keep the pigeons away from my Cime di Rapa and other brassicas.

What to do with a spare wellie?

Having small children we have inevitably have a supply of old small Wellington boots. What is it with children and wellies? Or perhaps it’s just my children? Every time we buy a pair of wellies we try to buy a decent pair, so they don’t wear out. Then inevitably they do just that, or the children’s feet grow! Anyway, this leaves us with a fare share of wellies to recycle. What to do with them? Well, one use I’ve come up with is to use them as planters.

20130906-123158.jpg
First you need to drill drainage holes through the soles of the wellingtons. Then put some polystyrene or other crocs in the bottom to help with drainage. Fill the boots with compost and then plant your plants in the top. I’ve planted nasturtiums and marigolds this year. They need a good water and will need to be regularly watered, like all containers. But they’ll do fine!

To liven up the fence at the plot I hung the wellies on the fence panels using cup hooks. It’s always nice to be met by flowers as we enter the plot.