It’s Been a While

My trips to the allotment have really gone by the way side recently. Through a combination of spending more time working on the Stoneham Bakehouse, trying to spend more time with the family, and the rubbish weather we’ve had this summer, the allotment has taken a back seat.

The allotment, for the last couple of years particularly, has been really important to me. Really important for my recovery from depression and anxiety, really important for my family to get some space, and really important in providing us with a variety of fresh vegetables and fruit.  

 As Autumn shows its true colours, with beautiful ruddy leaves appearing on the trees, I’m inspired to get back to the allotment with some regularity. Being outside is always beneficial to my wellbeing, and I sometimes need to be reminded of how it can help me. I think with weather set to be fine for the weekend, a trip to the plot is needed.

How can we help birds in our gardens?

One of the great things about having an allotment is having your own bit of the wild in which you can relax and enjoy the natural world. Gardens are increasingly being paved or decked and there is a constant pressure on green spaces in towns. Even in the countryside modern society is impacting on bird habitats; since 1945 more than 300,000 miles of hedgerow have been destroyed. Allotments offer the opportunity to reinstate some hedgerows. As well as providing birds with a place to hide and nest, our blackberry and rose hedge offers a diet of berries and haws to birds and small mammals alike. Hedges can also have advantages to the grower, providing stick supports for peas and beans, as well as defending delicate crops against harmful winds.

Needless to say the birds in our gardens (and allotments) benefit from a bit of additional food at this time of year. So, as well as the peanut wreath I blogged about before Christmas, I’ve hung some homemade seed cakes and fat balls on the trees. As long as you have some bird seed these are easy to make and are loved by birds.

20140106-110806.jpg

Fat Balls

Combine melted lard with a mix of seeds, oats and soaked raisins to a ratio of 1:2 fat to dry. Form into balls around a loop of string. Put in the fridge to set, then hang outside.

Gelatin Seed Cakes (makes 6)

  • 3/4 cup flour
  • 1/2 cup warm water
  • 4 leaves of gelatin
  • 3 tbsp. golden syrup
  • 4 cups birdseed
  • muffin tin or other mould
  • dash of oil
  • drinking straws
  • baking parchment
  • string/twine

Start by mixing the gelatin with the water and stirring until the gelatin has dissolved completely. Add the flour and the syrup and ensure it is all thoroughly combined. At this point stir the seeds into the liquid mix, making sure that they are well coated. Grease the mould, then place a short length of drinking straw in each section, before spooning the seed mix in and firming the mixture down using the back of a spoon. Leave the birdseed cakes for a few hours to set, then remove from mould and remove straws (leaving a hole in each cake). Allow the seed cakes to dry for a further few hour (overnight is even better), after which you can thread string through the hole and hang out for the birds.20140106-110739.jpg Once you’ve set out bird feeders, why not spend a little time seeing what visits your outside space? The RSPB are running its annual Big Garden Birdwatch on the weekend of the 25th-26th January. I’ll be up the plot to see what visits. How do you help the birds in your garden or allotment?

A Simple Christmas Dessert

The early apples we have, Beauty of Bath, really don’t keep. However, our plot is overhung by the most wonderful eating apple tree, and these apples keep pretty well. As a child we often had baked apples, stuffed with sultanas and Demerara sugar, for desert and I decided to have one the other day for lunch. Being that it is Christmas, and we had an open jar of mincemeat in the fridge, I chose to fill the centre of the fruit with some of this festive fruit and nut mix. Teamed with a splash of cream over the hot apple, the sharpness contrasts brilliantly with the sweet mincemeat.20131218-122415.jpg

You will need

1 Cooking Apple (A Bramley is ideal)
1 tbsp Mincemeat
Cream to serve
 
Preheat the oven to 180°C. Core your apple and fill the space where the core was with the mincemeat. Bake for 30 minutes until golden on top and soft and fluffy inside. Serve with a splash of cream.

20131218-122658.jpg

A Haven of Calm and Solitude

20131114-125530.jpgIn my role as a teacher I was constantly talking, or listening to others talk. A typical day involved me spending virtually no time on my own. I was also working in a stressful environment. Teaching is not an obviously stressful job – it’s not like a heart surgeon or an air traffic controller. The stress is in the desire to do the best for the children, to give them the best start to life, to ensure they can access the wonderful world of learning.

Since starting my sabbatical I’ve discovered silence and the power of solitude. I’ve come to realise that one needs to have space to think, to do what you want, to just be. The allotment is a vehicle for this. Yes, the plot is hard work to maintain, but there are no targets or pressures from outside. Also, I can go there and do nothing. Just sit, listen and think; and that’s the beauty, I can choose to do something or not. It allows me to control my time and if I want just enjoy the haven of calm.

Where is your haven of calm?

Apple Flapjack for an Allotment Bonfire Night

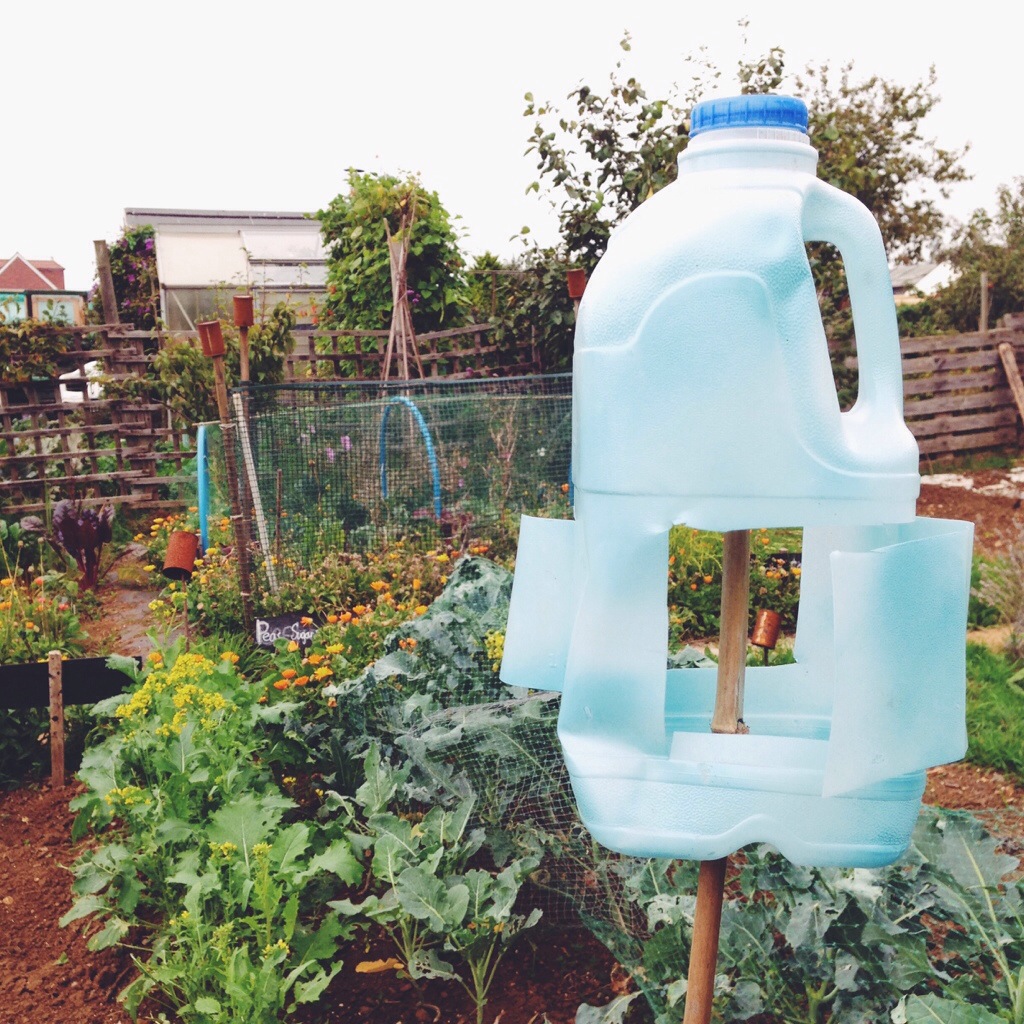
Our allotment site is a great slice of society. The plot is surrounded by others tended by young working families, elderly couples, the unemployed, hard worked public sector workers; people of all races and creeds. It is a great and supportive community, and last night we shared on a bonfire celebration. Allotment holders from across the site got together and sat around a raging fire enjoying the local firework display, cider made from our own apples, and pizzas cooked on the wood burning pizza oven.

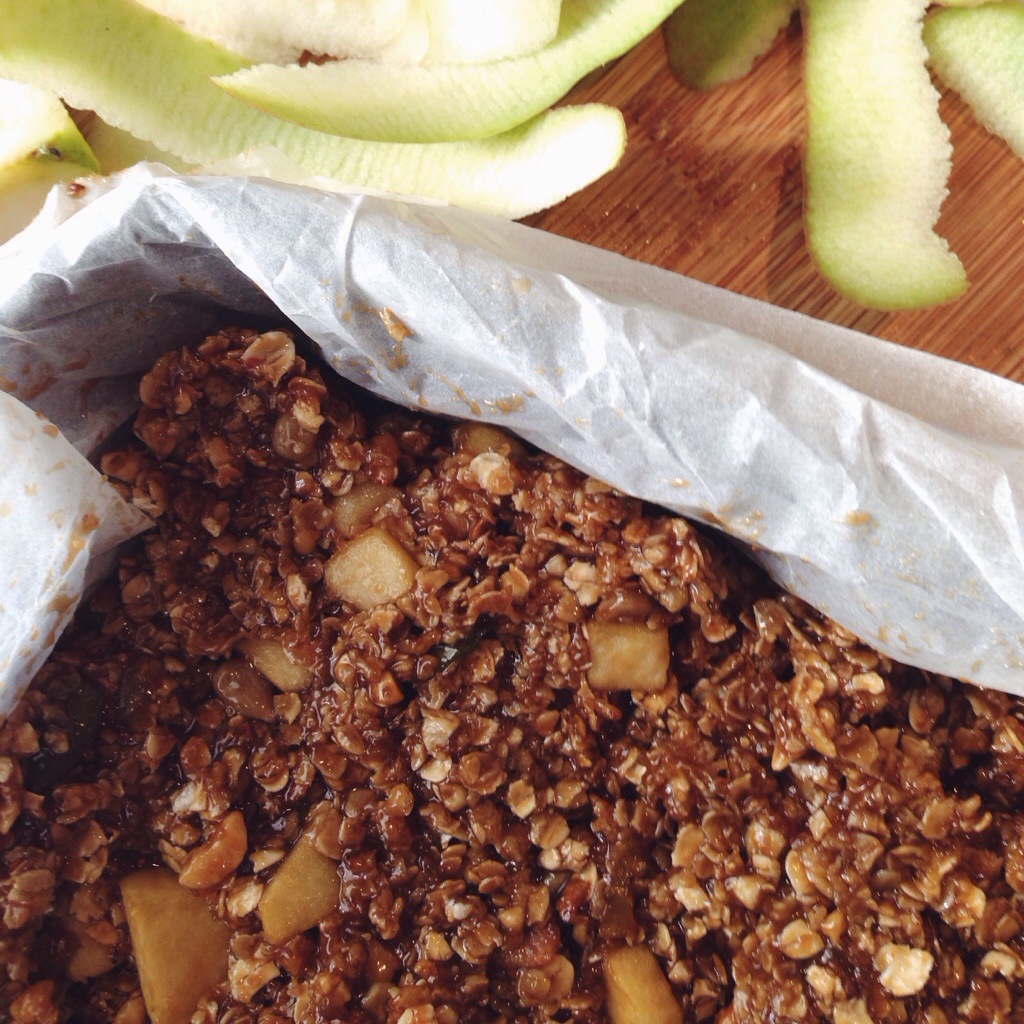
Wanting to contribute something to the proceedings, I decided to create a bonfire flapjack. As we still have quite a few windfall apples I chose to flavour it with them, and use some of the pumpkin seeds and sunflower seeds I’d collected last months. I often make River Cottage Honey and Peanut Butter Booster Bars, which used to be a big hit with my former colleagues. So I used the recipe as a basis for my Bonfire Apple Flapjack. To give it a more bonfire dark stickiness, I used dark muscovado sugar, and added a combination of grated and diced apple instead of huge dried fruits.

20131104-082434.jpg
What you will need
125g unsalted butter
125g dark brown muscovado sugar
100g no-sugar-added crunchy peanut butter
75g honey, plus a little more to finish
Grated cooking apple
Finely grated zest of 1 lemon
250g porridge oats (or the equivalent weight in oats and crushed leftover cereal)
A large apple peeled, cored and diced
100g mixed seeds (I used pumpkin and sunflower)

20131102-163320.jpg
Start by greasing and lining a baking tin, about 20cm square. Put the butter, sugar, peanut butter, honey, grated lemon zest and cooking apple in a deep saucepan over a low heat. Heat until the mixture is melted, stirring occasionally. Combine the oats, diced apple and most of the seeds into the melted butter mixture and stir until it’s thoroughly combined. Spread the mixture out evenly in the baking tin, smoothing the top as you go. Finally scatter the rest of the seeds over the surface and trickle with a little more honey. At this point I tend to use the palm of my hand to press down the mix slightly.
Pop the tin in an oven preheated to 160°C/Gas Mark 3 and bake for about 30 minutes, until the flapjack is golden all over and slightly crispy on the edges. It’s really important that it is left to cool completely before turning out and cutting into squares with a sharp knife. As Hugh Fearnley-Whittingstall suggests in his original recipe; this is a tricky task, but the flapjack will cut much better if you can manage to hang on before devouring. The crispy oats contrast well with the soft sweet apples, and the muscovado sugar hints of toffee apples on a cold afternoon. A perfect treat to munch whilst watching fireworks and watching the dancing flames of a bonfire.

20131103-093237.jpg

Allotment herbs into the winter

The allotment was decidedly nippy the other morning. Bright and beautiful, but nippy nonetheless. The majority of the summer crops have finished and the plot has taken on a different hue; moving from a lush green to more of an earthy brown, as crops are sown and planted to overwinter.
Of course, some of the crops will survive the coming months. The herbs like rosemary and sage will continue to provide fresh flavour to the kitchen. However, others like mint and basil will die off as the cold days encroach. So, a few weeks ago I decided to cut a load of herbs and dry them in the shed. We use a lot of dried herbs, oregano, mixed herbs, they all help to flavour our sauces and stews. It made sense to not waste the fabulous flavours the plot and try to keep them to use in the winter.

20131021-135721.jpg
To dry the herbs, all I did was cut a good bunch of a range of herbs, tied them into bunches and hung them in the shed. After a few weeks they had dried to a crispy, crumbly texture. The last stage was to crush the herbs, place in jars, label and add to the store cupboard for use later. Some of the herbs I kept on their own, but I also created an ‘allotment mix’ as well. It will be great to pull out the vibrant flavour of the allotment when it’s cold and wet outside.

20131021-141112.jpg
I’m addition to cutting and drying herbs before the winter comes, it’s also a good time to take cuttings from the woodsy herbs such as rosemary and sage. Choose a vigorous, non-flowering, shoot. Cut it off just below the leaf node or joint. Next strip off most of the leaves, leaving the top few. Place the cuttings in a pot filled with compost and vermiculite in roughly equal parts. You need to water the compost and then cover with a plastic bag or bottle to create condensation. After 4-6 weeks in direct sunlight, the cuttings should have rooted and can be planted out in the spring. From one plant, you can give yourself a load of new ones.

20131021-141953.jpg

Rocket and other salads

This year has really been a good one for a steady crop of salad products from the plot. I’ve grown Romaine, as well as Mustard, Lollo Rosso and other mixes. It’s meant that, instead of buying bags of hermetically sealed supermarket salad, we’ve enjoyed a fresh supply of whatever is at the plot. Latterly this has included pickings of less conventional, but easily as tasty, nasturtiums, beetroot and chard. They all add variety of flavour; from the peppery nasturtiums, to the more earthy flavours of the beets. It’s said you also eat with your eyes; and the ruby red veins on the chard leaves, as well as the yellow and orange nasturtium flowers, really are appetising.

20131010-120048.jpg These have all been in and out of our salad selections, but the ever present is rocket. It’s a gardeners’ (and cooks’) friend. Speedy to grow, it produces lots of peppery leaves which can be cut and will regrow for further pickings. It also makes a great frittata or pesto.

I’ve found that rocket can bolt in the heat of summer (and experienced it a bit this year). So I tend to sow in partial shade – in my case in a cold frame which is situated under one of our apple trees. We’ve got some old polystyrene mushroom boxes which have made great planters, as they don’t tend to dry out that quickly when filled with rich moisture retentive compost (we’ve punched a few drainage holes in the bottom). All you need to do is sow (a little every week or so) and water when necessary. It’s October now and the rocket is still going strong. Indeed, I think I may sow some more in the greenhouse.

20131010-120302.jpg

Got the Bottle?

20131003-125426.jpg Sometimes when watching TV it’s what the producers don’t intend you to focus on that’s the part that sticks. Watching Gardener’s World last week, I noticed a great reuse of plastic milk bottles. Like many of us with families we get through our fair share of the 2l bottles, and although we recycle them, I always think that there must be a good way to reuse them. At the plot we also have a problem with pigeons taking a liking to our brassicas, causing a serious dent in the rows of Cime di Rapa and Kale. So the chance viewing of wind operated bottle bird scarer got me thinking. Armed with a quick sketch from the TV screen I set about recreating them with our own pile of leftover bottles.

What you will need

Old 2l plastic milk bottles (with lid on)

Scissors Bamboo cane/stick

First you will need to make a hole in the middle of the base of the bottle. It needs to be slightly larger than the diameter of the stick or cane, so that it can spin around. The cutting of the flaps is the most crucial step (and one I got wrong repeatedly before finally succeeding). The flaps need to be cut so that they go around the edges of the bottle (this allows the wind to catch them better and turn the bottle). They also need to be cut so both flaps encourage the bottle to turn the same way (see the image above). Once the flaps are cut, fold back and out to maximise the cup size, and then place the whole bottle on the bamboo cane. I decided to lightly spray paint mine with the leftovers of some enamel paint, but other than that, that’s it. So far the winds haven’t been too strong and the bird scarers have been gentle rotating, but as the winds get up during the autumn they should keep the pigeons away from my Cime di Rapa and other brassicas.

Penne with Cime di Rapa

The Cime di Rapa on the plot has reached maturity and I’ve begun to harvest the quick growing brassica. One of the classic dishes of Puglia is Orichiette con Cime di Rapa and to me it seemed a good plan to start eating the Cime di Rapa in this classic Italian pasta dish.

Looking online (as I tend to do to get ideas for meals) I found that, although the basic recipe was the same, there was quite a bit of variation in ingredients to accompany the Cime di Rapa. Some included cherry tomatoes, and the plot has a surfeit of them at the moment, so I included them. So I ended up with my own version of the dish, which I hope has some authenticity to it.

20131021-164919.jpg

What you will need (serves 2)
200g Penne (we had Penne in the cupboard, so used this instead of the classic Orichiette)
100g Cime di Rapa (trimmed to include thinner stalks and the floriferous heads)
3 anchovies (finely chopped)
10 cherry tomatoes (cut into halves)
1 clove of garlic (finely chopped)
Small pinch of chilli flakes
Handful of chopped parsley and grated Parmesan to finish the dish.

Bring a saucepan of salted water to the boil and cook the pasta (adding the Cime di Rapa after the first five minutes). Cook the penne until al dente, draining and retaining a small amount of the pasta water. As the pasta cooks fry the garlic, chilli flakes, anchovies and the chopped tomatoes. Once the pasta is drained, add to the sauce and toss to thoroughly mix. At this point I added a little of the pasta cooking water to bring the sauce together, then stirred in the Parmesan and parsley before serving.

October at Plot 4

I was talking to a friend the other day and she asked what the plot looked like. This got me thinking. Perhaps I should post a picture each month to show it through the seasons. Its character certainly changes over the year. So I’m going to post a few pictures at the start of each month, so I can track the plots progress.

October can bring the first frosts and is definitely a time to start to put the plot to bed for the winter. This has been my view for the last few years; but I’ve come to realise that the last weeks of September and the first in October are a good opportunity to harvest and begin to sow crops to cover the winter and beyond. So this year, apart from the usual tidying of the plot, netting the brassicas and pruning the blackberries (brambles), I’ll be planting too.

We use a lot of onions, and white onions are cheap from the local grocer, so we’ll be growing red onions and shallots this year (planted as sets on a ridge to prevent waterlogging in our clay soil). I’ll be planting garlic on ridges soon, as I find the winter cold is vital in ensuing the bulb splits well into cloves. As for varieties, I haven’t decided yet, but will be checking out Lottie Landgirl’s post on onions for some advice.

I’ll also be planting some broad beans in the next few weeks. Last year we sowed them in the spring and they were fairly successful, however we’ve had greater success in the past with autumn sowings. So for 2014 we’ll be sowing soon, then doing another sowing in the spring to ensure some succession and a lengthy supply of the fabulous beans. Unlike onions, broad beans are expensive in the shops, so by growing them at the plot we can still enjoy them at a fraction of the price.