Gooseberry & Elderflower Curd

gooseberry

The gooseberries on the plot are looking fabulous at the allotment. We’ve got one of the slightly more unusual red varieties of gooseberry, and their dark red jewels are protected by a barrier of thorns. I like the fact that these berries are surrounded by vicious spikes, it means the fruits don’t tend to get eaten by the usual marauding flocks of animals and birds, and there is an increased sense of satisfaction in picking them without getting too spiked!

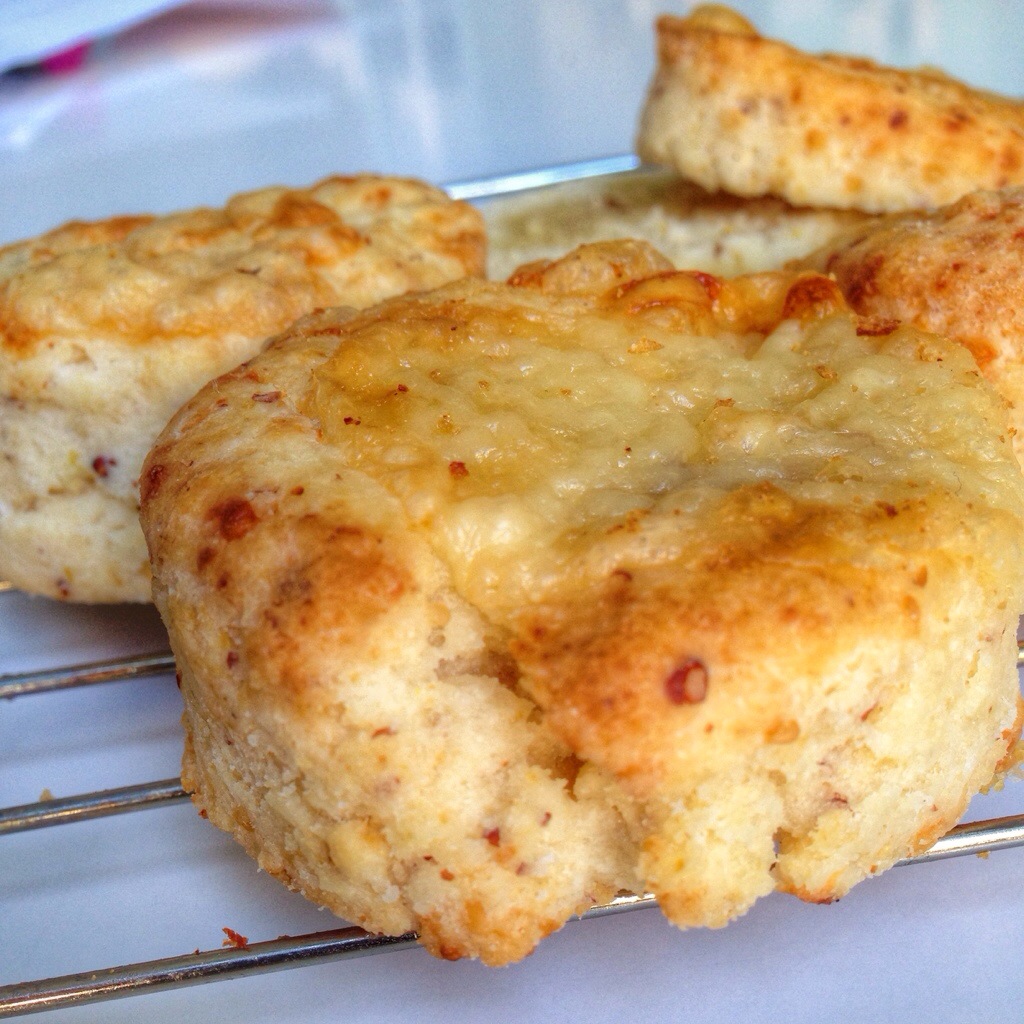
Gooseberries are a great fruit to have on the plot. They pretty much look after themselves, and you can get two crops from them; one when you thin the small green (and rather sharp) fruits to make space for the main crop, the other as the red bulging fruits ripen. The flavour of these later fruits is distinctly floral, with a pleasing balance of sweet and sharp. Perfect to add a bit of zing to an afternoon crumpet. An old fashioned thing perhaps, curd is a brilliant addition to your breakfast table. Simultaneously tart and sweet, its velvety texture gives a touch of luxury to the morning toast.

The classic curd is lemon, but as my allotment is not on the mediterranean coast, the search for a tart and flavoursome fruit has taken me to gooseberies. The quinteseentially English early summer fruit.

You will need 

500g gooseberries
3 sprigs elderflowers (or a dash of elderflower cordial)
100ml lemon juice
125 unsalted butter
450g granulated sugar
200ml strained beaten egg (4 or 5 eggs)

Cook the gooseberries, lemon juice and elderflower for a while until the fruit collapses and the juices flow. Allow the puree to cool a bit, then rub through a sieve to form a puree. Mix the puree, butter and sugar together in a basin over a pan of boiling water. Stir until the butter has melted and you have a smooth texture. Take off the heat and allow to cool a little (about acceptable finger dipping cool). Pour the strained beaten eggs into the berry mixture, then whisk over the boiling water until thick and creamy. Pour into sterilised jars and allow to cool fully before spreading on hot toast, using in a cake, or just dipping in a spoon for a quick taste!

Rhubarb and Strawberry Cordial

This year seems to be a great year for rhubarb and strawberries. The plot is awash with bright red berries, and the rhubarb is looking more and more like its giant cousin, Gunnera. As the weather hots up, its always good to be able to turn to a homemade thirst quencher, with the sweetness of the strawberries contrasting with the tart rhubarb.

You will need (Makes about 1.5 litres)

1kg rhubarb (chopped into large chunks)
1kg strawberries
Granulated sugar
1 tsp Citric acid (if you want to keep coridal for long time)

Place your rhubarb & strawberries in a large saucepan.  Add 200 ml of water to the pan. Bring slowly to the boil, crushing the fruit gently with a wooden spoon or, as I did, a potato masher, as it heats. Continue to heat gently until the fruit is soft and the juices flow. Scald a jelly bag or muslin square and suspend over a large bowl or pan.  Tip the fruit into it and leave to drip overnight in an undistrubed place. t

The next day, take the juice and pour into a clean pan. For every 1 litre of juice add 700g sugar (or to taste). If you want the cordial to last for a long while, then add a tsp of citric acid at this point. It prevents fermentation occuring in the bottle, ensuring you don’t have any exploding bottles later in the year. Heat the mixture gently to dissolve the sugar, then remove from the heat. Pour immediately into warm, sterilised bottles, leaving a 1cm gap at the top. Seal. Once cool, I like to enjoy my cordial with ice cold sparkling water.

Getting in and out of a Pickle

Of all the elements of a Japanese meal, the pickles are my favourite. I love the acidity and punch they give to any dish. Pickling is a great way to preserve vegetables at their freshest, making use of their youthful crunchiness to prepare a brilliant condiment to many dishes. Pickling, like fermentation and other food preservation techniques, has become more popular recently; and one of the reasons must be the way in which it allows you to stop wastage of different vegetables, extending their life.  This ability to use up vegetables you have in excess makes pickles the friend of the allotmenteer. Noone who has an allotment hasn’t encountered the courgette glut, or been overrun by runner beans. With the ability to pickle the excess, these gluts are more manageable. I’ve already got too many cucmber plants growing in (and out of) the greenhouse, so I started thinking about the plan to manage the situation.

Last week I received a hamper from the people at Farmers’ Choice, an online free-range butchers and grocers. They have the tagline ‘from Dirt to Doorstep’, and pride themselves on their high standard of animal welfare and local producers. The food box I received had a mix of meat (a free-range chicken, mince, pork chops), as well as a range of seasonal veg. Included in this were spring onions, radishes and cucumbers; the perfect vegetables to perfect my pickling.

Cucumber and Radish Japanese Pickle

You will need

3tbsp cider vinegar
1tbsp caster sugar
1tbsp mirin
1 cucumber
300g radishes
1 spring onion
1/2 tbsp fine sea salt

Start by preparing the pickling liquid, combining the vinegar and sugar and stirring until the sugar is disolved. Finely slice the radishes and spring onion, before halving the cucumber and scooping out the seeds. Finely slice the cucumber into half moon shapes. Sprinkle the vegetables with salt, mix together, then leave for half an hour or so. The salting will draw out moisture, increasing the crunch in the vegetables. Thoroughly rinse, then dry, the veg before placing in the pickling liquid. Place in the fridge, the pickle will be ready after an hour or so.

pickled veg

I served this pickle with some of the chicken made into a delicious kebab. Marinated in a lemon juice and mint, the meat had a great flavour and complimented the pickle brilliantly. The pickles would also make a super accompaniment to a burger, the acidity of the pickled radishes and cucumber cutting through the meatiness of the burger.

I’ll be saving some of my veg gluts to pickle later in the year, they’re a great way of extending the shelf life of vegetables and providing a zingy accompaniment to dishes.

A Sussex Allotmenteer’s Lunch

The Ploughman’s lunch is a British classic, and appears in many guises on the menus of pubs and cafes across the country. Whether it is steeped in tradition is debateable, but there is no doubt that the combination of bread, cheese, chutney and pickles is a winner. Teamed with a pint in a sunny pub garden, there is little better to consume on a spring lunchtime. So, when looking for something to take to the allotment for lunch, I often end up creating something Ploughman’s like. It is a real favourite of mine.

Merrydown cider recently gave me a couple of bottles and invited me to create a Ploughman’s as part of a Sussex food blogger challenge; so ever eager to promote local ingredients, I created this Sussex version of the classic. I prefer a cheese ploughman’s, so a bit of the wonderful Sussex Charmer is a must. Produced by Bookham Harrison farm, it combines recipes for farmhouse cheddar and parmesan to produce a creamy cheese with a bit of punch.

In terms of a bread, it has to be a crunchy loaf with a good crumb. I’ve long wanted to make a bread using cider, so used some Merrydown as the liquid in a loaf which combines wheat and rye flour. Based on a Richard Bertinet recipe, the result is perfect teamed with the strong flavours of the cheese and chutney.

cider bread

Cider Bread

You will need (makes one large loaf)

Pre-ferment
100g strong white flour
25g light rye flour
2g yeast
2g salt
90g water
Main bread mix
3g yeast
250g strong white flour
5g salt
150g good cider (I used Merrydown)
Start by making your pre-ferment by combining the ingredients together, kneading a little, then leaving for 6 hours or so. This helps to give a mature flavour to the bread. After this initial ferment; mix with the remaining ingredients and knead for 5-10 minutes until the dough is smooth and elastic. Shape into a ball and place it back into a bowl, cover with a tea towel or plastic and leave to prove for a further 45-60 minutes.
When the dough has proved for nearly an hour, remove from the bowl and shape into a batard. I placed mine in a banneton, but a floured tea towel would be fine. Cover and leave to prove for 1 and half hours, or until the loaf has nearly doubled in volume. To bake, turn the loaf onto peel (or the floured back of a baking tray), spray the inside of the oven with water, and then slide the loaves onto a preheated (240°C) baking stone or tray. Bake for 10 minutes, then turn down the heat to 200°C, and bake for about 35 minutes until well coloured. The loaf should be hollow in sound when tapped. Allow to cool before slicing.

Apple & Cider Chutney

You will need (makes one large jar)

100g sultanas
1 pint cider (I used Merrydown Sussex Cider)
4 eating apples, peeled and chopped (there are lots of great varieties from Sussex, with my friends at Brighton Pemaculture Trust working hard to preserve them).
3 onions, finely chopped
1 cup granulated sugar
1/2 cup soft brown sugar
1 cup cider vinegar
1/2 tsp peppercorns
1/2 cinnamon stick
1/4 tsp chilli flakes
1 tsp coriander seeds
1 star anise

Start by soaking the sultanas in the cider overnight. In the morning, place the spices into a muslin bag and secure tightly. Put all the ingredients, including the sultanas with cider, into a large heavy based pan and bring to the boil. Turn down and simmer for a couple of hours, until the mixture achieves a sticky chutney consistency and the surplus watery liquid has evaporated. Whilst still hot put into sterilised jar and allow to cool.


How to make Nasturtium Capers

When we were in Sicily this summer, one of the ingredients which I found in the market of Ortigia was capers. The region, and especially the island of Pantelleria, is famous for these little preserved flower buds, and they appear in many of Sicily’s traditional dishes. I love the saltiness of them, the way they bring a real punch to dishes. Back here in the UK, we can get capers in the shops, but they’re not nearly as good as those from the Ortigian market.

We don’t have our own home grown capers; but the allotment is awash with nasturtiums, and the seeds of this butterfly-like flower can be brined and pickled in the same way as capers to produce a good home-grown alternative. Picked whilst still green, soaked in brine, and pickled in vinegar infused with allotment herbs; these nasturtium ‘capers’ can be used like their Sicilian cousins.

You will need (Makes 2 x 115g jars)
15g salt
100g nasturtium seed pods
A few peppercorns
A few herbs; I used fennel tips and a bay leaf or two
1 tsp sugar
200ml white wine vinegar

Make a brine by dissolving the salt in 300ml of water. Clean up the seeds, discarding any seeds which are yellow or brown, as these won’t be tender and full of flavour after pickling. Put the remaining seeds into a bowl and cover with the cold brine, before leaving for 24 hours. The next day drain the seed pods and dry well. Pack them into small, sterilised, jars with the peppercorns and herbs, leaving 1cm at the top so the vinegar will cover the seeds well. Bring the vinegar and sugar to the boil, then pour over the seeds and seal the jars with sterilised vinegar-proof lids. Store in a cool, dark place and leave for a few weeks before eating. Use within a year.

Nasturtium capers

Dealing with the June Drop – How to Make Mint Sauce

One of the most frustrating things about growing any crop is when, for the sake of improving the quality of yield, you have to remove fruits or seedlings. To me this seems to be wrong. I know thinning seedlings means that the plants that remain have more space to develop and grow healthily, but the very fact that I’ve nurtured them to that point means I feel a sense of attachment and of lost potential. That’s why, whenever I can, I use the thinnings in meals. When it comes to apples, nature, as if to ensure I don’t get lazy and just let things go, steps in with the ‘June Drop’. The annual time of year when the apple tree chooses to drop a few of the extra fruits, self regulating to give those fruit that remain the best chance of forming properly and going on to ripen to their potential.

I know its July, but the drop has only just happened in earnest and the apple trees at the plot have a scattering of undersized, under ripe, apples in the grass below. Unripe apples are not a culinary highlight of the year, but they do have one great asset. Pectin. Like the super-sour crab apple, these dropped fruits are full of pectin and when tempered with sugar they are also light on flavour. As such they can be used in preserves to produce a beautiful herb jelly. This month has also seen a mint infused takeover of the allotment. The ever invasive herb has spread its refreshing leaves between and beneath almost al of the top half of the plot. So in effort to capture the mintiness for later in the season when mint suffers in the baking heat, I made mint jelly. The perfect accompaniment to roast lamb, and infinitely better than the supermarket fluorescent green version.

mint jelly

You will need (makes  jars)
500g unripe apples (cooking apples would do the job if apples are actually in season)
1 bunch of mint
Granulated sugar
30ml white wine vinegar

Chop the apples roughly; if they are small, then just chop them in half. Add to a pan with the bunch of mint and enough water to barely cover the apples. Bring to the boil, then simmer for 45 minutes or so, until the fruit is very soft. Pour the contents into a scolded jelly bag and leave to drip overnight. Don’t be tempted to squeeze the bag, or poke it, as this will effect the clarity of your jelly.

straining the pulp

Measure the strained juice, before adding the sugar. For every 200ml of liquid you will need 150g of sugar. Return the liquid to the cleaned out pan, with the addition of the vinegar. Heat to boiling point, stirring to ensure the sugar is dissolved properly. Continue to boil for 10 minutes or so, until the setting point is reached. For this I use a jam thermometer and wait until the bubbling liquid gets to 104°C, before removing from the heat, skimming off the scum, and then pouring into warm, sterilised jars. Once sealed with a lid, the mint jelly will last up to a year. Not that it will last that time, as it’s an irresistible accompaniment to lamb.

mint jelly

Elderflower Cordial

I look forward to the first few Elderflower blooms on the tree at the allotment. For me it really marks the start of the growing season, and in particular the start of the period of cropping from the allotment. At the moment the Queen of the Hedgerow is covering the land with white blooms and its heady scent. Elderflower has historically been known as a medicinal herb; being diaphoretic, anti-inflammatory and anti-catarrhal, and can be prepared as tea, tincture or a cold infusion. In culinary terms it is used in fritters, and perhaps most often made into a cordial. For me an ice cold drink of Elderflower cordial with a sprig of mint is the perfect summer afternoon refresher, and best of all its cheap and easy to make your own.

20140514-180724.jpg

 You will need
About 25 elderflower heads – Elderflowers need to be picked in the first half of the day and in sunshine in order to get the best cordial.
Finely grated zest of 3 lemons and 1 orange, plus their juice (about 150ml in total)
1kg sugar
1 heaped tsp citric acid (optional)

Check out the elderflower heads carefully and remove any bugs and bits. Place the flower heads in a large bowl together with the orange and lemon zest. Pour 1.5 litres boiling water over the elderflowers and citrus zest. Cover and leave to infuse overnight. Strain the liquid through a jelly bag, before pouring into a saucepan. Add the sugar, the lemon and orange juice and the citric acid to help preserve the drink and make it clear. Heat gently to dissolve the sugar, then bring to a simmer and cook for a couple of minutes. Once ready, use a funnel to pour the hot syrup into sterilised bottles. Seal the bottles with swing-top lids, then pasteurise for twenty minutes at 80°C. Even without pasteurisation I have had bottles last for several months, and enjoyed the cordial well into the autumn.

I’m entering this recipe for Four Seasons Food celebrating the vegetables of spring.  FSF is run by Anneli at Delicieux and Louisa at Eat Your Veg who is hosting this month.

45dad-fsf-spring

I’m also dead chuffed to be shortlisted in the FOOD category for the BIBS (Brilliance in Blogging Award). If you think I deserve to be in the final then please vote for me by clicking on the picture below. Thank you for all your support!

BiB Food 2014


Favourite Five Mustard Recipes

Spadeforkspoon Favourite FiveMustard is a great ingredient offering piquancy to many a dish. It is a member of the Brassica family of plants which has tiny round edible seeds as well as tasty leaves. Its English name, mustard, comes from a contraction of the Latin mustum ardens meaning burning must. This refers to the spicy heat of the crushed mustard seeds and the French practice of mixing the ground seeds with must, the young, unfermented juice of wine grapes. Although mustard was considered a medicinal plant initially, it has become a staple of many food cultures. Prepared mustard dates back thousands of years to the early Romans, who used to grind mustard seeds and combine them with wine to form a paste not much different from the prepared mustards we have today. It’s a store cupboard essential and here are my favourite five uses of mustard.

Mustard Soup  – This is a delicious soup which I first tasted in Amsterdam. It combines the piquancy and texture of wholegrain mustard with a silky smooth creme fraiche based liquor. Simple to make and a great winter warmer.

Cheese and Mustard Scones – Cheese scones are one of life’s little pleasures; especially so when served warm and the butter melted slightly on top. The addition of a little grain mustard really brings out the cheesiness, and gives them a slightly more sophisticated flavour. My son has recently been diagnosed as coeliac, so this recipe is for gluten free scones, but the addition of mustard to your usual cheese scone recipe would work. Combine 275g gf plain flour, 50g ground almonds, 3tsp baking powder, 2 tsp xanthum gum and 1 tsp salt in bowl and rub 100g butter into the dry mix to make breadcrumbs. Add 100g of whatever cheese you have around (generally cheddar and Parmesan in our case). Combine 2 eggs with a tbsp wholegrain mustard and 125ml yoghurt. Pour this into breadcrumb mix and bring the ingredients together with a fork. Turn the dough onto a floured surface and flatten to 3cm thick, before cutting out into scone shapes. Transfer onto a baking sheet, brush the tops with a little milk and grate a little more cheese on top. Cook for 10 minutes at 220 °C. Leave to cool slightly before eating.

Piccalilli – This has been my food revelation of the year. For years I’ve seen the yellow pots of Piccalilli on sale and thought they looked over processed and not too tempting. Then early in 2013 I had a dish in Bridport which had a delicious Piccalilli accompanying pig’s head croquettes. It just worked so well. So, when I had a glut of veg at the plot, I made some of my own and it’s been in constant use ever since. As well as vegetables from the plot, it uses a combination of English mustard powder and mustard seeds to make a simple punchy preserve.

Mustard mash – A simple use of wholegrain mustard to give the humble mash a bit of a twist. Boil, drain and mash your potatoes, before adding a knob of butter and a spoonful of wholegrain mustard. It goes brilliantly with sausages, but would work with other meats too.

Mustard and Honey Dressing – This is our ‘go-to’ dressing. Throughout most of the year we have a jar of this in the fridge. It’s speedy to make, lasts a few days, and really compliments a range of salad leaves. To make, just add the following to a jar with a screw-top lid: 3tbsp olive oil, 1tbsp lemon juice, 1 tsp Dijon mustard, 1/2 clove of garlic crushed, 1/2 tbsp honey, pinch of salt and sugar and a few twists of black pepper. Cap and shake vigorously to emulsify. It can be easily upsized for the summer months, when there isn’t a day that goes by without salad featuring on our plates.

mustard dressing
What ways do you use mustard in your cooking?


Marmalade Memories

Foods can be amazing at recalling memories; the smell of certain ingredients, or the taste of others can take you back to a different time or place. Whenever I have marmalade on crispy thick cut white toast, it takes me into my grandparents’ kitchen and sharing breakfast with my Grandpa. I love the dark and slightly bitter taste of good marmalade, its a real treat in the morning.

You will need (makes 5-6 450ml jars)

1kg Seville Oranges
75ml Lemon Juice
2kg Demerara Sugar

20140202-091847.jpgGive the oranges a good clean and remove the buttons at the top of the fruit, then cut in half. Squeeze out the juice and keep it to one side. I’ve found that the seville oranges need to have some of the pith from inside the skin removed, which I do using a spoon and scraping away the thicker parts. Using a sharp knife, slice the peel, pith and all, into shreds, according to your preference. Put the sliced peel into a bowl with the juice of the oranges and cover with 2.5 litres of water. Leave to soak overnight.marmalde making

Pour the whole mixture into a preserving pan and simmer until the fruit is tender (about 2 hours), before adding the sugar and the lemon juice. Bring to the boil, stirring until the sugar has dissolved. Boil rapidly until setting point is reached, about 20-25 minutes. Take off the heat. Leave to cool for 8-10 minutes to help the chunks to be distributed evenly. Pour into warm, sterilised jars and seal immediately.

Over the years I have eaten three-fruit, fine-shred, lime, even ginger infused marmalade; but chunky classic marmalade has always taken me back to my Grandpa’s kitchen. What are your marmalade memories?

Piccalilli from the Plot

The allotment is still producing large amounts of cucumbers and courgettes, and there are still the last few green beans too. This reminded me that some of this produce should be preserved in order to keep the plot providing into the autumn and winter. I’m a fan of chutneys and pickles. They are both a great way of using up a glut at the plot, and a delicious (and vital) component to any cheese and cold meat dish. The Festive Period is not the same without a chutney or pickle.

During a mini break in April, my wife and I stayed at the fantastic Bull Hotel in Bridport and enjoyed some amazing pigs head croquettes, accompanied by piccalilli. It was a delicious dish and I’d like to recreate some time. I can’t very easily get hold of a pigs head, but the crop of cucurbits at the allotment have provided me worth the ingredients for an allotment piccalilli.

The Oxford English Dictionary traces the word piccalilli to the middle of the 18th century when, in 1758, Hannah Glasse described how “to make Paco-Lilla, or India Pickle”. The use of spices like cumin, coriander and turmeric give the pickle an Indian feel and vibrant colour, but it is an archetypal English preserve.

As a fan of Pam Corbin’s River Cottage Handbook: Preserves; I based my own piccalilli on her recipe, using a combination of courgettes, cucumbers and dwarf green beans as the vegetable content.

What you will need
1kg washed/peeled crunchy veg
50g fine salt
30g cornflour
10g ground turmeric
10g English mustard powder
15g mustard seeds
1tsp crushed cumin seeds
1tsp crushed coriander seeds
600ml cider vinegar
150g granulated sugar
50g honey

20130915-200038.jpg

Cut the vegetables into even bite sized pieces. As I said, I used courgettes, cucumber and dwarf beans (but you could use pretty much anything). Sprinkle with salt, mix well, cover and leave in a cool place for 24 hours. Rinse thoroughly with cold water and drain to remove as much water as possible.

20130915-150317.jpg 20130915-150326.jpg

Blend spices and cornflour to a smooth pasted with some of the vinegar. Put the rest of the vinegar, sugar and honey in a pan and bring to the boil. Pour some of the hot vinegar over the spicy paste, stir well and return to the pan. Bring gently to the boil for 3-4 minutes to thicken and flavour the sauce.

20130915-150334.jpg

Remove the pan from the heat and carefully fold the vegetables into the hot, spicy sauce. Pack the pickle into warm, sterilised jars and seal immediately. Pam Corbin recommends leaving the piccalilli for 4-6 weeks before eating (to allow the flavours to mature), but that was too long to wait, so a week later I opened the deliciously fragrant and crunchy pickle to accompany a nice ham sandwich.

20130916-121715.jpg