Getting in and out of a Pickle

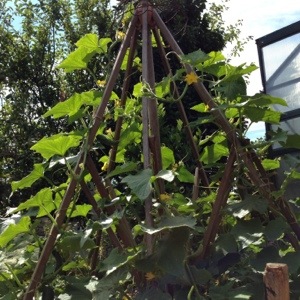
Of all the elements of a Japanese meal, the pickles are my favourite. I love the acidity and punch they give to any dish. Pickling is a great way to preserve vegetables at their freshest, making use of their youthful crunchiness to prepare a brilliant condiment to many dishes. Pickling, like fermentation and other food preservation techniques, has become more popular recently; and one of the reasons must be the way in which it allows you to stop wastage of different vegetables, extending their life.  This ability to use up vegetables you have in excess makes pickles the friend of the allotmenteer. Noone who has an allotment hasn’t encountered the courgette glut, or been overrun by runner beans. With the ability to pickle the excess, these gluts are more manageable. I’ve already got too many cucmber plants growing in (and out of) the greenhouse, so I started thinking about the plan to manage the situation.

Last week I received a hamper from the people at Farmers’ Choice, an online free-range butchers and grocers. They have the tagline ‘from Dirt to Doorstep’, and pride themselves on their high standard of animal welfare and local producers. The food box I received had a mix of meat (a free-range chicken, mince, pork chops), as well as a range of seasonal veg. Included in this were spring onions, radishes and cucumbers; the perfect vegetables to perfect my pickling.

Cucumber and Radish Japanese Pickle

You will need

3tbsp cider vinegar
1tbsp caster sugar
1tbsp mirin
1 cucumber
300g radishes
1 spring onion
1/2 tbsp fine sea salt

Start by preparing the pickling liquid, combining the vinegar and sugar and stirring until the sugar is disolved. Finely slice the radishes and spring onion, before halving the cucumber and scooping out the seeds. Finely slice the cucumber into half moon shapes. Sprinkle the vegetables with salt, mix together, then leave for half an hour or so. The salting will draw out moisture, increasing the crunch in the vegetables. Thoroughly rinse, then dry, the veg before placing in the pickling liquid. Place in the fridge, the pickle will be ready after an hour or so.

pickled veg

I served this pickle with some of the chicken made into a delicious kebab. Marinated in a lemon juice and mint, the meat had a great flavour and complimented the pickle brilliantly. The pickles would also make a super accompaniment to a burger, the acidity of the pickled radishes and cucumber cutting through the meatiness of the burger.

I’ll be saving some of my veg gluts to pickle later in the year, they’re a great way of extending the shelf life of vegetables and providing a zingy accompaniment to dishes.

Advertisement

7 Fruit and Vegetables to Eat this Autumn

Autumn is without doubt my favourite season. It starts in September with the last hoorah of summer, and makes its way through to the cold of November. So when Ashley, of US food blog My Heart Beets, asked me to write a guest post on this season’s fruit and veg, I jumped at the chance. Check it out and let me know what would be in your 7 Fruit and Vegetables to Eat this Autumn.

7-fruits-and-vegetables-to-eat-this-fall myheartbeets

How to train tomatoes

Whilst tomatoes should have been planted out by now, you can still get them from nurseries and garden centres, ready grown and ready to nurture to cropping. The smell of fresh tomatoes, let alone the unbeatable taste of fruits picked from the vine, makes growing them well worth it.


Once your tomato plants have grown to about a foot in height, support them with a cane or stick at their side which you can use to tie them into as they grow. It’s importance to tie the. plants to a cane before they have a chance to drop, as this encourages them to grow up and produce more fruiting spurs. As they grow, pinch out all side shoots of your cordon tomatoes, but you can leave the bush types well alone to fill out. Once cordons have formed six or so fruiting trusses you should pinch out the tops. In reality I tend to let them hit the roof of the greenhouse, then pinch out the tips.


I under-plant my tomatoes with basil, as basil and tomato go together. It makes it easy to make a basil and tomato salad, but also has a preventative effect on aphids. Companion planting with French marigolds – tagetes – also works as the aphids will be repelled by their smell. Watering is crucial for consistently good fruits. Before the flowers have formed, water once a week or so and feed once a fortnight. Once the flowers and fruit have formed, water twice a week and feed once a week. What tomatoes don’t like is inconsistent watering, this tends to lead to splits and problems with bottom rot. Like children, they appreciate a routine and will repay you when they are looked after in a consistent way.

Once ready ripe, keep picking, this will help to extend the harvest as long as possible. It also means you can use them in a range of delicious recipes. Check out some tomato recipes here.

Swiss Chard

Whenever I’m asked by people about what to grow when you take over an allotment, or start a veg bed at home, the answer is always the same. Potatoes and Swiss chard. Potatoes are great, as they do some of the soil improving work for you, not least when you have to dig your harvest in the summer. However, Swiss chard is the real star, it just keeps on giving. We got turned on to chard when we used to get a veg box from the fantastic Barcombe Nurseries. We’d get home from work to find a small box of vegetable and fruit delights; each week a different selection, but nearly always including Swiss chard. It’s just so versatile. It can be used as a spinach alternative, mixed with ricotta to fill cannelloni or ravioli for example; but its earthy, iron-rich flavours are robust enough to be an accompaniment to a piece of meat after only a wilting with some garlic and a dash of lemon juice and olive oil. Its stalks can be chopped and added to curries, or steamed, then made into a cheesy gratin.

I’ve found that Swiss chard is also pretty easy to grow and incredibly hardy, often lasting for over a whole season. Like spinach and beetroot (to which it is related) it has a seed cluster, and each cluster can produce three or four seedlings. I tend to grow mine in modules (a cluster to each section) and then prick out weaker plants, before transplanting out. This seems to allow the plants to establish before setting them in the path of the slugs that prowl my allotment; the plants larger size is defence enough from the potential mollusc attack. Once established the plants grow well, and if picked sparingly from the outer leaves, will give you a harvest for a significant season. The baby leaves are an excellent addition to a mixed salad, and if you sow the ruby or rainbow varieties, add colour too. Indeed, I would suggest rainbow chard is worth sowing for the vibrant colour of the leaves alone.

Last night we used this delicious leaf in a simple chard pilaf to accompany a range of curries which had been in the freezer in small portions.

You will need
400g Swiss chard
200g uncooked rice, pre-soaked for 10 minutes
50ml olive oil
75g chopped spring onions
1 lemon, squeezed
A handful of chopped fresh coriander

Wash the Swiss chard well. Remove the stalks and finely chop, then shred the leaves and set aside to drain. Heat the oil and soften the spring onions before seasoning with salt and a pinch of garam masala.  Add the rice and toss it in the onions for a few minutes, so that it is coated in the spicy oil. Then throw in the chard stalks, leaves, and coriander and cook for a minute or so.  Add 400ml boiling water (or better still stock) and bring to the boil. Cover, reduce the heat to a simmer and cook for about 15-20 minutes or until the rice is just cooked. Allow the pilaf to stand for a few minutes before serving.
 

20140211-113925.jpg

October at Plot 4

I was talking to a friend the other day and she asked what the plot looked like. This got me thinking. Perhaps I should post a picture each month to show it through the seasons. Its character certainly changes over the year. So I’m going to post a few pictures at the start of each month, so I can track the plots progress.

October can bring the first frosts and is definitely a time to start to put the plot to bed for the winter. This has been my view for the last few years; but I’ve come to realise that the last weeks of September and the first in October are a good opportunity to harvest and begin to sow crops to cover the winter and beyond. So this year, apart from the usual tidying of the plot, netting the brassicas and pruning the blackberries (brambles), I’ll be planting too.

We use a lot of onions, and white onions are cheap from the local grocer, so we’ll be growing red onions and shallots this year (planted as sets on a ridge to prevent waterlogging in our clay soil). I’ll be planting garlic on ridges soon, as I find the winter cold is vital in ensuing the bulb splits well into cloves. As for varieties, I haven’t decided yet, but will be checking out Lottie Landgirl’s post on onions for some advice.

I’ll also be planting some broad beans in the next few weeks. Last year we sowed them in the spring and they were fairly successful, however we’ve had greater success in the past with autumn sowings. So for 2014 we’ll be sowing soon, then doing another sowing in the spring to ensure some succession and a lengthy supply of the fabulous beans. Unlike onions, broad beans are expensive in the shops, so by growing them at the plot we can still enjoy them at a fraction of the price.

The Great Cucumber Monster

On a walk back from the school run one day I noticed someone had thrown out a wooden parasol. It got my attention, but I had no use for a broken sun shade. A trawl later through Pinterest (it was wet) led me to a photo of a cucumber frame made from an old parasol. Ever keen to reuse rather than recycle I returned from next morning’s school run with a broken parasol and hot-footed it over to the plot. A quarter of an hour later the allotment had its very own cucumber frame! No cucumbers, but a great piece of reclaimed garden architecture.

20130904-142340.jpg

Fired up by cucumber enthusiasm I bought seeds, sowed and raised plants to populate frame. The standard parasol has eight spurs and so I duly planted eight cucumber plants. After a few weeks the plants started to ramble up the wood and I repeatedly tied them to the spurs to tame the evergrowing eight armed cucumber monster!

20130904-142723.jpg

Eight cucumber plants produce a lot of cucumbers and nearly everyone we know now has an almost unlimited supply if cucumbers.

20130904-142854.jpg

Now to investigate cucumber recipes as there seems no end to the supply – and I’ve got another plant growing in the greenhouse!