Got the Bottle?

20131003-125426.jpg 
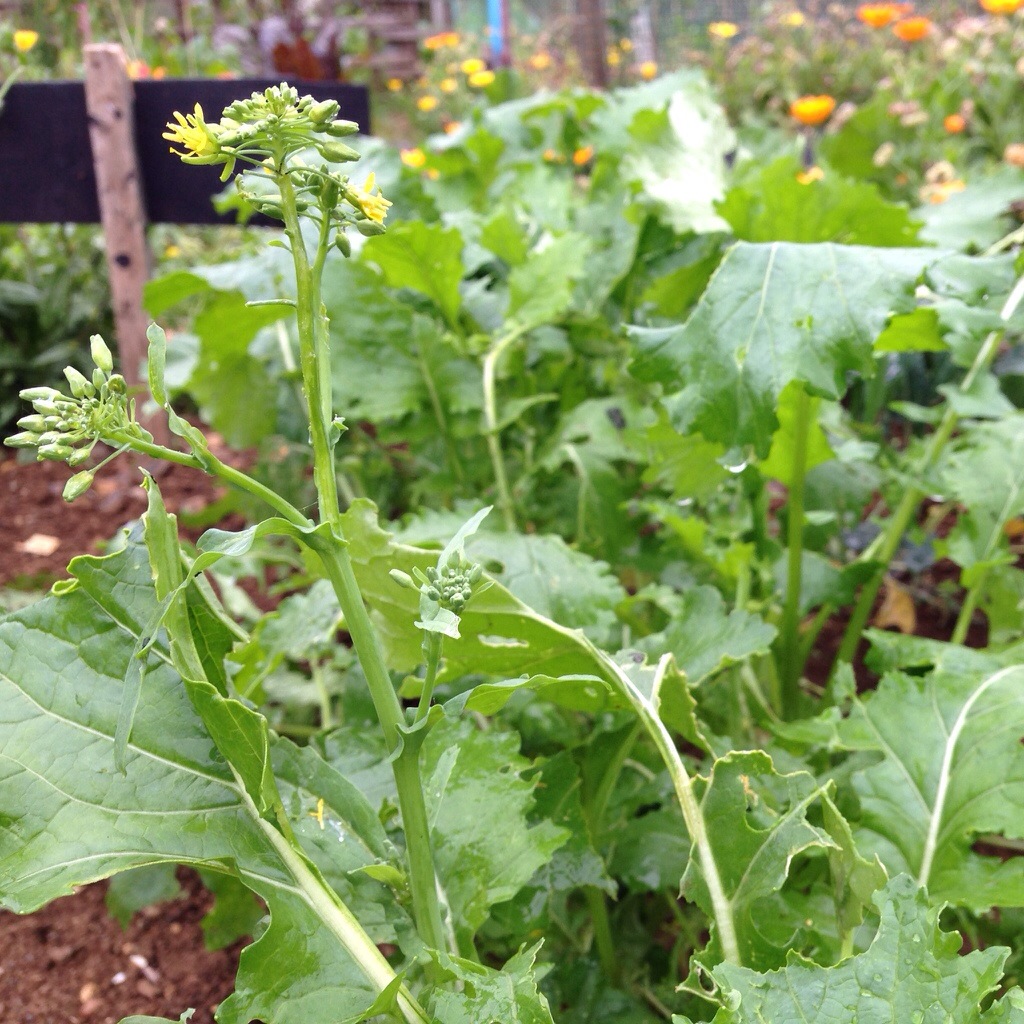
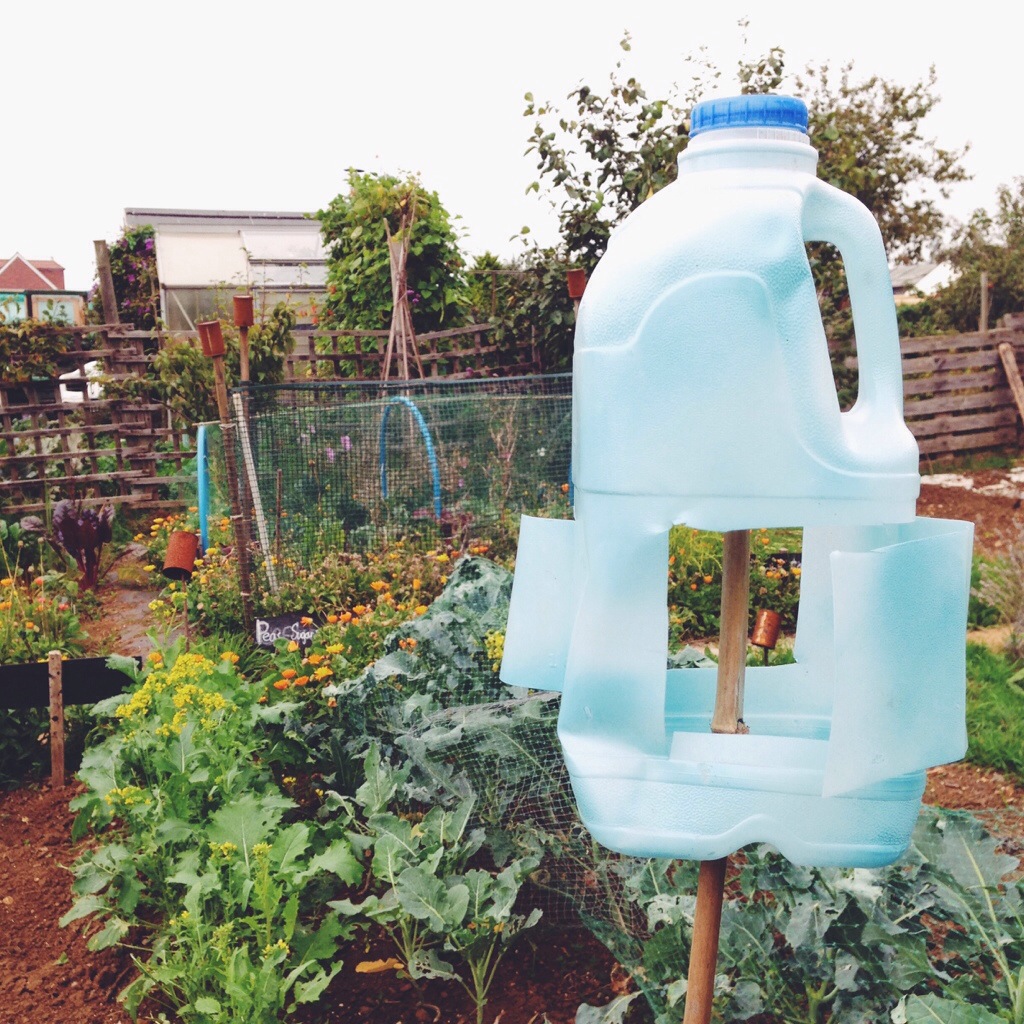
Sometimes when watching TV it’s what the producers don’t intend you to focus on that’s the part that sticks. Watching Gardener’s World last week, I noticed a great reuse of plastic milk bottles. Like many of us with families we get through our fair share of the 2l bottles, and although we recycle them, I always think that there must be a good way to reuse them. At the plot we also have a problem with pigeons taking a liking to our brassicas, causing a serious dent in the rows of Cime di Rapa and Kale. So the chance viewing of wind operated bottle bird scarer got me thinking. Armed with a quick sketch from the TV screen I set about recreating them with our own pile of leftover bottles.

What you will need

Old 2l plastic milk bottles (with lid on)

Scissors Bamboo cane/stick

First you will need to make a hole in the middle of the base of the bottle. It needs to be slightly larger than the diameter of the stick or cane, so that it can spin around. The cutting of the flaps is the most crucial step (and one I got wrong repeatedly before finally succeeding). The flaps need to be cut so that they go around the edges of the bottle (this allows the wind to catch them better and turn the bottle). They also need to be cut so both flaps encourage the bottle to turn the same way (see the image above). Once the flaps are cut, fold back and out to maximise the cup size, and then place the whole bottle on the bamboo cane. I decided to lightly spray paint mine with the leftovers of some enamel paint, but other than that, that’s it. So far the winds haven’t been too strong and the bird scarers have been gentle rotating, but as the winds get up during the autumn they should keep the pigeons away from my Cime di Rapa and other brassicas.

Fish on a Friday

Last night we had breaded plaice and tomato salsa for dinner. I love the combination (adapted from Hugh Fearnley-Whittingstall’s River Cottage Everyday) of the sweet and sharp tomatoes with the subtle flavours of the plaice. We usually get our fish from the fabulous Brighton and Newhaven Fish Sales on Shoreham Harbour. It’s a great place, offering a plethora of different fish with expertise and a friendly smile. During the summer I went along to one of their advance fish preparation courses. There were five others who wanted to spend a Tuesday evening wielding a knife and trying to perfect the perfect fillet under the expert tuition of one of the fishmongers. Over the ninety minutes, we learnt how to fillet both round fish (some lovely Sea Bass) and the more tricky flat fish (Plaice). In addition to the tuition, all the fish we filleted were ours to take away. So armed with a big bag containing ten bass fillets and ten of plaice, I walked home thinking of ways to use my fabulous filleted fish.

The next dates for their fish and shellfish preparation courses are Tuesday 15th October and Wednesday 27th November. These will cover dressing a crab, filleting mackerel, cleaning squid and gutting bream. Priced at £30 with lots to take home.The next advanced course which is perfect if you know a bit already will be on Tuesday 29th October. This is priced at £35 at we will cover filleting flat and round fish with lots to take home. You can get more information from their website.

20131002-120137.jpg

Penne with Cime di Rapa

The Cime di Rapa on the plot has reached maturity and I’ve begun to harvest the quick growing brassica. One of the classic dishes of Puglia is Orichiette con Cime di Rapa and to me it seemed a good plan to start eating the Cime di Rapa in this classic Italian pasta dish.

Looking online (as I tend to do to get ideas for meals) I found that, although the basic recipe was the same, there was quite a bit of variation in ingredients to accompany the Cime di Rapa. Some included cherry tomatoes, and the plot has a surfeit of them at the moment, so I included them. So I ended up with my own version of the dish, which I hope has some authenticity to it.

20131021-164919.jpg

What you will need (serves 2)
200g Penne (we had Penne in the cupboard, so used this instead of the classic Orichiette)
100g Cime di Rapa (trimmed to include thinner stalks and the floriferous heads)
3 anchovies (finely chopped)
10 cherry tomatoes (cut into halves)
1 clove of garlic (finely chopped)
Small pinch of chilli flakes
Handful of chopped parsley and grated Parmesan to finish the dish.

Bring a saucepan of salted water to the boil and cook the pasta (adding the Cime di Rapa after the first five minutes). Cook the penne until al dente, draining and retaining a small amount of the pasta water. As the pasta cooks fry the garlic, chilli flakes, anchovies and the chopped tomatoes. Once the pasta is drained, add to the sauce and toss to thoroughly mix. At this point I added a little of the pasta cooking water to bring the sauce together, then stirred in the Parmesan and parsley before serving.

A Little Rhubarb and a Portuguese Custard Tart (pastéis de nata)

When I visit cafés, I often look longingly at the pastries and wonder whether I could produce something similar in my own kitchen. One of my favourites is the Portuguese custard tart – Pastéis de nata. So, when this week I was left with a half a block of puff pastry and a grey day in which to bake, I set about having a go. Bought puff pastry is so easy to use, and it wasn’t too long before a mini batch of these luscious, egg custard filled, crispy tarts.

What you will need
Butter, for greasing
150ml double cream
250ml milk
Zest of one lemon
1/4 tsp of vanilla bean paste
4 egg yolks
2 tablespoons cornflour
125g caster sugar
150g chilled ready-made puff pastry
Flour, for dusting

Preheat the oven to 190°C, gas mark 5 and grease a 12-hole mini muffin tin. The mix is enough for 24 mini tarts, so you could make a dozen larger muffin size ones instead. Put the cream, milk, vanilla bean paste and lemon zest in a saucepan. Bring to a simmer, then take off the heat and set aside. Next whisk the egg yolks, cornflour and sugar in a bowl until it comes together in a paste. Pass the milk mixture through a fine-mesh sieve into the bowl of egg paste. You need to be quick and thorough at mixing the cold egg paste with the warm milk mixture to prevent you creating a sweet scrambled eggs. once mixtures are combined, pour back into the saucepan and heat over a moderate heat until it thickens – do not let it boil.

20131002-120916.jpg

The custard made, roll out the pastry on a lightly floured work surface as thin as you can manage (the thinner you mange it, the more crispy the pastry). Roll the pastry up into a long sausage shape and cut it into 24 discs. Roll out each disc to about 6cm in diameter and press them into the holes of the muffin tin. Before filling with the custard mix, use a fork to prick the bases with a fork and fill with the custard mixture until half full. Finally, place the tarts in the oven for about 18-20 minutes until browned on top.

20131002-120854.jpg

As a child we often had rhubarb with our custard tart, so as we still have a bit if rhubarb at the plot, I decided to serve the little tarts with a bit of roasted rhubarb. To sweeten it I used a combination of a bit of sugar and some runny honey, roasting the chopped rhubarb for 20 minutes until soft, but not falling apart. The sharp taste of the rhubarb contrasts well with the silky sweet custard, but the tarts go equally go well with an espresso.

October at Plot 4

I was talking to a friend the other day and she asked what the plot looked like. This got me thinking. Perhaps I should post a picture each month to show it through the seasons. Its character certainly changes over the year. So I’m going to post a few pictures at the start of each month, so I can track the plots progress.

October can bring the first frosts and is definitely a time to start to put the plot to bed for the winter. This has been my view for the last few years; but I’ve come to realise that the last weeks of September and the first in October are a good opportunity to harvest and begin to sow crops to cover the winter and beyond. So this year, apart from the usual tidying of the plot, netting the brassicas and pruning the blackberries (brambles), I’ll be planting too.

We use a lot of onions, and white onions are cheap from the local grocer, so we’ll be growing red onions and shallots this year (planted as sets on a ridge to prevent waterlogging in our clay soil). I’ll be planting garlic on ridges soon, as I find the winter cold is vital in ensuing the bulb splits well into cloves. As for varieties, I haven’t decided yet, but will be checking out Lottie Landgirl’s post on onions for some advice.

I’ll also be planting some broad beans in the next few weeks. Last year we sowed them in the spring and they were fairly successful, however we’ve had greater success in the past with autumn sowings. So for 2014 we’ll be sowing soon, then doing another sowing in the spring to ensure some succession and a lengthy supply of the fabulous beans. Unlike onions, broad beans are expensive in the shops, so by growing them at the plot we can still enjoy them at a fraction of the price.

Season of soups and mellow fruitfulness

Season of mists and mellow fruitfulness,
Close bosom-friend of the maturing sun;
Conspiring with him how to load and bless
With fruit the vines that round the thatch-eves run;
John Keats, Ode to Autumn

Before I started Spadeforkspoon I looked around the blogosphere and found many which gave me food for thought when it came to what went into my blog. One of the blogs I love is The Little Button Diaries, produced by my friend Laura, and her friend Tia. Its mix of craft, baking and babies was inspiration for my own dual focused blog. So I was excited to be asked to write a guest post for them and decided on my own Ode to Autumn – a season I absolutely adore, a season of soups and mellow fruitfulness.

20130919-122136.jpg

Cime di Rapa

My wife and I really like Purple Sprouting Broccoli and grow it at the allotment. However, we can’t grow it all year round and refuse to pay for the imported crops out of season. Earlier in the year I discovered an alternative – Cime di Rapa. This is basically a variety of broccoli (despite the name referring to turnips) and although not known in this country is widely grown and eaten in Italy. One of the key advantages if this brassica is its speed of growth – different varieties range from 30-90 days from seed to harvest. The fantastic Franchi Seeds sell a number of varieties (I grew Cime di Rapa Quarantina, a 40 days variety).

20130923-211952.jpg
I sowed the seeds with 10cm gaps between each station (sowing a few seeds at each stop). Once sowed Cime di Rapa does pretty well left to its own devices. I’ve thinned some of the rows to get larger plants; but as the leaves alone can be eaten as greens, this is not necessarily needed. When the plants are at a reasonable size the flower heads can be picked and used as you would Purple Sprouting Broccoli. In Italy, it’s often eaten a part of a pasta dish, Orecchiette con Cime di Rapa is one of Puglia’s signature dishes.

I’ve used the Cime di Rapa as an accompaniment to Pork Chops stuffed with sage and bacon. The greens were treated very simply; steamed, then tossed in garlic infused olive oil and finished off with a squeeze of lemon juice. The slightly bitter flavours contrasting brilliantly with the sweet pork meat. The wilted greens also make a great bruschetta topping.

Writing this post has reminded me – I’m off to the plot in a moment to sow some more Cime di Rapa.

Chocolate Mousse for Greedy Goose

The kids both love the books of Julia Donaldson and the illustrations of Nick Sharratt, and so really enjoyed Chocolate Mousse for Greedy Goose. The title of this book has led to all chocolate mousse in our family being referred to as “chocolate mousse for greedy goose”. Yesterday, asked what he wanted for pudding, he asked for the aforementioned mousse – so I got about finding a recipe.

Whilst searching around for a quick and easy mousse, I came across the blog of Nick Coffer – My Daddy Cooks. This is a man after my own heart, enjoying time spent cooking with his young kids. What’s more, he had a recipe for chocolate mousse (using yoghurt instead of the egg yolks often found in recipes). The recipe really is quick and easy – there is even a video to show the process (although the video is clearly sponsored by a well known Greek Yoghurt brand). I actually used homemade yoghurt, as I find it cheaper to make my own yoghurt.

Anyway, they went down well judging by the chocolate faces that greeted me across the kitchen table. Perhaps next time we’ll experiment with flavoured chocolate.

Piccalilli from the Plot

The allotment is still producing large amounts of cucumbers and courgettes, and there are still the last few green beans too. This reminded me that some of this produce should be preserved in order to keep the plot providing into the autumn and winter. I’m a fan of chutneys and pickles. They are both a great way of using up a glut at the plot, and a delicious (and vital) component to any cheese and cold meat dish. The Festive Period is not the same without a chutney or pickle.

During a mini break in April, my wife and I stayed at the fantastic Bull Hotel in Bridport and enjoyed some amazing pigs head croquettes, accompanied by piccalilli. It was a delicious dish and I’d like to recreate some time. I can’t very easily get hold of a pigs head, but the crop of cucurbits at the allotment have provided me worth the ingredients for an allotment piccalilli.

The Oxford English Dictionary traces the word piccalilli to the middle of the 18th century when, in 1758, Hannah Glasse described how “to make Paco-Lilla, or India Pickle”. The use of spices like cumin, coriander and turmeric give the pickle an Indian feel and vibrant colour, but it is an archetypal English preserve.

As a fan of Pam Corbin’s River Cottage Handbook: Preserves; I based my own piccalilli on her recipe, using a combination of courgettes, cucumbers and dwarf green beans as the vegetable content.

What you will need
1kg washed/peeled crunchy veg
50g fine salt
30g cornflour
10g ground turmeric
10g English mustard powder
15g mustard seeds
1tsp crushed cumin seeds
1tsp crushed coriander seeds
600ml cider vinegar
150g granulated sugar
50g honey

20130915-200038.jpg

Cut the vegetables into even bite sized pieces. As I said, I used courgettes, cucumber and dwarf beans (but you could use pretty much anything). Sprinkle with salt, mix well, cover and leave in a cool place for 24 hours. Rinse thoroughly with cold water and drain to remove as much water as possible.

20130915-150317.jpg 20130915-150326.jpg

Blend spices and cornflour to a smooth pasted with some of the vinegar. Put the rest of the vinegar, sugar and honey in a pan and bring to the boil. Pour some of the hot vinegar over the spicy paste, stir well and return to the pan. Bring gently to the boil for 3-4 minutes to thicken and flavour the sauce.

20130915-150334.jpg

Remove the pan from the heat and carefully fold the vegetables into the hot, spicy sauce. Pack the pickle into warm, sterilised jars and seal immediately. Pam Corbin recommends leaving the piccalilli for 4-6 weeks before eating (to allow the flavours to mature), but that was too long to wait, so a week later I opened the deliciously fragrant and crunchy pickle to accompany a nice ham sandwich.

20130916-121715.jpg

An Apple a Day

This year by all accounts; despite, or indeed because of, the cold start to the year, has been a great year for apples on the plot. Indeed around the country, wherever I’ve been, there has been apple trees laden with fruit. The fruit trees planted on road verges often tempt me to pull over and pick their bounty.

20130911-144756.jpg

However, the two trees on my plot are providing us with enough apples to keep the family in an apple a day each. We also drink a bit of fruit juice though. So it got me thinking. Could we use our own apples to make our own apple juice? The answer seems to be yes. We live near to the National Collection of Cider andrry and they offer a juicing service during the later summer and autumn. For 63p a litre you can get your crop juiced while you wait (booking needed). Once crushed using a shredder type machine, they put the pulp into a press and squeeze out the juice. In our case, we have ‘Beauty of Bath’ apples, the juice that came out was pinkish in colour and as my son said “tasted just like the apples”.I suppose that’s the point. Unlike bought juice, we know exactly what goes into this juice – just apples!

20130911-145414.jpg

Well actually, I discovered that in order to prolong the life of my delicious juice, I needed to add citric acid to ensure that the juice didn’t go brown. Teamed with a home pasteurisation process, borrowed from The Cider Workshop, I now have bottles of apple juice which should keep for longer than a few days and not ferment and produce cider. An alternative is to freeze it, but we didn’t have much space in our small freezer. We needed an alternative. Hopefully, my amateur pasteurisation will be a success and not an explosive failure.