Allotment herbs into the winter

The allotment was decidedly nippy the other morning. Bright and beautiful, but nippy nonetheless. The majority of the summer crops have finished and the plot has taken on a different hue; moving from a lush green to more of an earthy brown, as crops are sown and planted to overwinter.
Of course, some of the crops will survive the coming months. The herbs like rosemary and sage will continue to provide fresh flavour to the kitchen. However, others like mint and basil will die off as the cold days encroach. So, a few weeks ago I decided to cut a load of herbs and dry them in the shed. We use a lot of dried herbs, oregano, mixed herbs, they all help to flavour our sauces and stews. It made sense to not waste the fabulous flavours the plot and try to keep them to use in the winter.

20131021-135721.jpg
To dry the herbs, all I did was cut a good bunch of a range of herbs, tied them into bunches and hung them in the shed. After a few weeks they had dried to a crispy, crumbly texture. The last stage was to crush the herbs, place in jars, label and add to the store cupboard for use later. Some of the herbs I kept on their own, but I also created an ‘allotment mix’ as well. It will be great to pull out the vibrant flavour of the allotment when it’s cold and wet outside.

20131021-141112.jpg
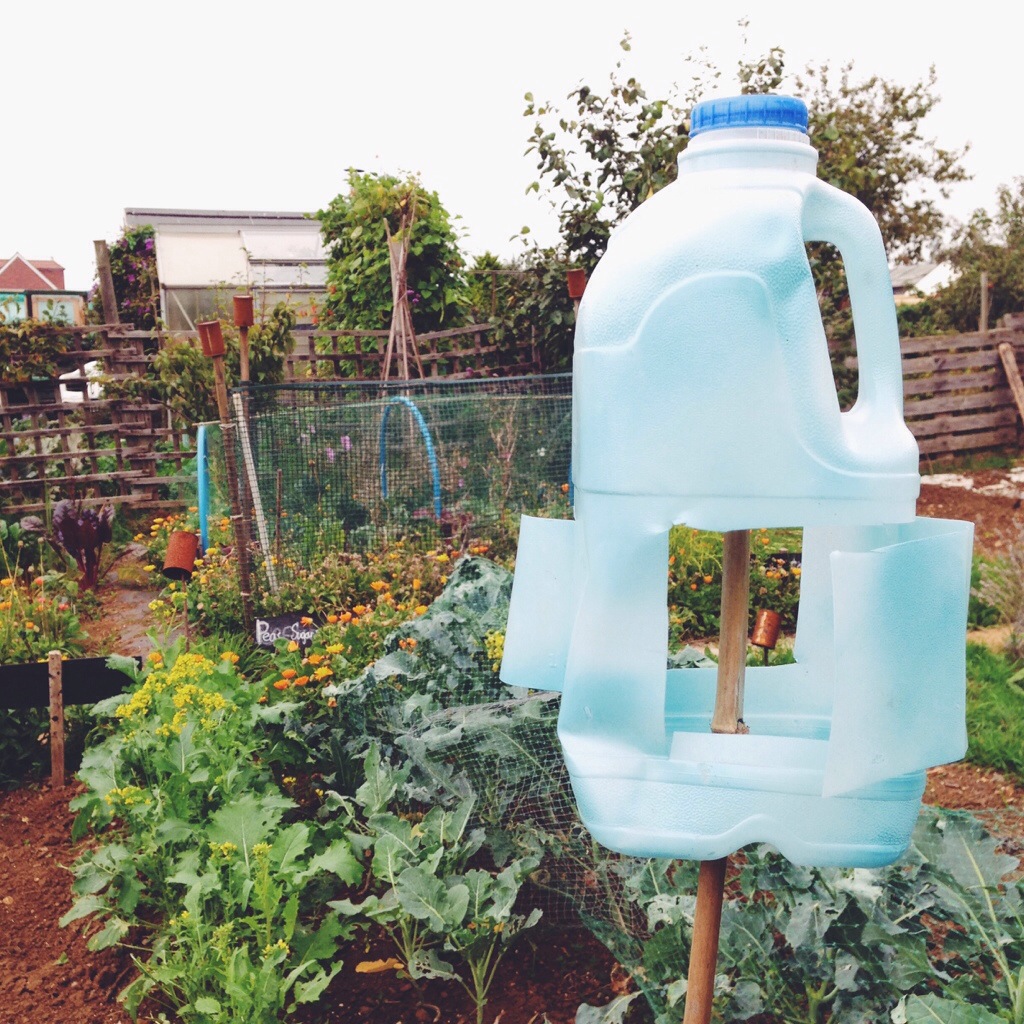
I’m addition to cutting and drying herbs before the winter comes, it’s also a good time to take cuttings from the woodsy herbs such as rosemary and sage. Choose a vigorous, non-flowering, shoot. Cut it off just below the leaf node or joint. Next strip off most of the leaves, leaving the top few. Place the cuttings in a pot filled with compost and vermiculite in roughly equal parts. You need to water the compost and then cover with a plastic bag or bottle to create condensation. After 4-6 weeks in direct sunlight, the cuttings should have rooted and can be planted out in the spring. From one plant, you can give yourself a load of new ones.

20131021-141953.jpg

Got the Bottle?

20131003-125426.jpg Sometimes when watching TV it’s what the producers don’t intend you to focus on that’s the part that sticks. Watching Gardener’s World last week, I noticed a great reuse of plastic milk bottles. Like many of us with families we get through our fair share of the 2l bottles, and although we recycle them, I always think that there must be a good way to reuse them. At the plot we also have a problem with pigeons taking a liking to our brassicas, causing a serious dent in the rows of Cime di Rapa and Kale. So the chance viewing of wind operated bottle bird scarer got me thinking. Armed with a quick sketch from the TV screen I set about recreating them with our own pile of leftover bottles.

What you will need

Old 2l plastic milk bottles (with lid on)

Scissors Bamboo cane/stick

First you will need to make a hole in the middle of the base of the bottle. It needs to be slightly larger than the diameter of the stick or cane, so that it can spin around. The cutting of the flaps is the most crucial step (and one I got wrong repeatedly before finally succeeding). The flaps need to be cut so that they go around the edges of the bottle (this allows the wind to catch them better and turn the bottle). They also need to be cut so both flaps encourage the bottle to turn the same way (see the image above). Once the flaps are cut, fold back and out to maximise the cup size, and then place the whole bottle on the bamboo cane. I decided to lightly spray paint mine with the leftovers of some enamel paint, but other than that, that’s it. So far the winds haven’t been too strong and the bird scarers have been gentle rotating, but as the winds get up during the autumn they should keep the pigeons away from my Cime di Rapa and other brassicas.

October at Plot 4

I was talking to a friend the other day and she asked what the plot looked like. This got me thinking. Perhaps I should post a picture each month to show it through the seasons. Its character certainly changes over the year. So I’m going to post a few pictures at the start of each month, so I can track the plots progress.

October can bring the first frosts and is definitely a time to start to put the plot to bed for the winter. This has been my view for the last few years; but I’ve come to realise that the last weeks of September and the first in October are a good opportunity to harvest and begin to sow crops to cover the winter and beyond. So this year, apart from the usual tidying of the plot, netting the brassicas and pruning the blackberries (brambles), I’ll be planting too.

We use a lot of onions, and white onions are cheap from the local grocer, so we’ll be growing red onions and shallots this year (planted as sets on a ridge to prevent waterlogging in our clay soil). I’ll be planting garlic on ridges soon, as I find the winter cold is vital in ensuing the bulb splits well into cloves. As for varieties, I haven’t decided yet, but will be checking out Lottie Landgirl’s post on onions for some advice.

I’ll also be planting some broad beans in the next few weeks. Last year we sowed them in the spring and they were fairly successful, however we’ve had greater success in the past with autumn sowings. So for 2014 we’ll be sowing soon, then doing another sowing in the spring to ensure some succession and a lengthy supply of the fabulous beans. Unlike onions, broad beans are expensive in the shops, so by growing them at the plot we can still enjoy them at a fraction of the price.

Cime di Rapa

My wife and I really like Purple Sprouting Broccoli and grow it at the allotment. However, we can’t grow it all year round and refuse to pay for the imported crops out of season. Earlier in the year I discovered an alternative – Cime di Rapa. This is basically a variety of broccoli (despite the name referring to turnips) and although not known in this country is widely grown and eaten in Italy. One of the key advantages if this brassica is its speed of growth – different varieties range from 30-90 days from seed to harvest. The fantastic Franchi Seeds sell a number of varieties (I grew Cime di Rapa Quarantina, a 40 days variety).

20130923-211952.jpg
I sowed the seeds with 10cm gaps between each station (sowing a few seeds at each stop). Once sowed Cime di Rapa does pretty well left to its own devices. I’ve thinned some of the rows to get larger plants; but as the leaves alone can be eaten as greens, this is not necessarily needed. When the plants are at a reasonable size the flower heads can be picked and used as you would Purple Sprouting Broccoli. In Italy, it’s often eaten a part of a pasta dish, Orecchiette con Cime di Rapa is one of Puglia’s signature dishes.

I’ve used the Cime di Rapa as an accompaniment to Pork Chops stuffed with sage and bacon. The greens were treated very simply; steamed, then tossed in garlic infused olive oil and finished off with a squeeze of lemon juice. The slightly bitter flavours contrasting brilliantly with the sweet pork meat. The wilted greens also make a great bruschetta topping.

Writing this post has reminded me – I’m off to the plot in a moment to sow some more Cime di Rapa.

Piccalilli from the Plot

The allotment is still producing large amounts of cucumbers and courgettes, and there are still the last few green beans too. This reminded me that some of this produce should be preserved in order to keep the plot providing into the autumn and winter. I’m a fan of chutneys and pickles. They are both a great way of using up a glut at the plot, and a delicious (and vital) component to any cheese and cold meat dish. The Festive Period is not the same without a chutney or pickle.

During a mini break in April, my wife and I stayed at the fantastic Bull Hotel in Bridport and enjoyed some amazing pigs head croquettes, accompanied by piccalilli. It was a delicious dish and I’d like to recreate some time. I can’t very easily get hold of a pigs head, but the crop of cucurbits at the allotment have provided me worth the ingredients for an allotment piccalilli.

The Oxford English Dictionary traces the word piccalilli to the middle of the 18th century when, in 1758, Hannah Glasse described how “to make Paco-Lilla, or India Pickle”. The use of spices like cumin, coriander and turmeric give the pickle an Indian feel and vibrant colour, but it is an archetypal English preserve.

As a fan of Pam Corbin’s River Cottage Handbook: Preserves; I based my own piccalilli on her recipe, using a combination of courgettes, cucumbers and dwarf green beans as the vegetable content.

What you will need
1kg washed/peeled crunchy veg
50g fine salt
30g cornflour
10g ground turmeric
10g English mustard powder
15g mustard seeds
1tsp crushed cumin seeds
1tsp crushed coriander seeds
600ml cider vinegar
150g granulated sugar
50g honey

20130915-200038.jpg

Cut the vegetables into even bite sized pieces. As I said, I used courgettes, cucumber and dwarf beans (but you could use pretty much anything). Sprinkle with salt, mix well, cover and leave in a cool place for 24 hours. Rinse thoroughly with cold water and drain to remove as much water as possible.

20130915-150317.jpg 20130915-150326.jpg

Blend spices and cornflour to a smooth pasted with some of the vinegar. Put the rest of the vinegar, sugar and honey in a pan and bring to the boil. Pour some of the hot vinegar over the spicy paste, stir well and return to the pan. Bring gently to the boil for 3-4 minutes to thicken and flavour the sauce.

20130915-150334.jpg

Remove the pan from the heat and carefully fold the vegetables into the hot, spicy sauce. Pack the pickle into warm, sterilised jars and seal immediately. Pam Corbin recommends leaving the piccalilli for 4-6 weeks before eating (to allow the flavours to mature), but that was too long to wait, so a week later I opened the deliciously fragrant and crunchy pickle to accompany a nice ham sandwich.

20130916-121715.jpg

What to do with a spare wellie?

Having small children we have inevitably have a supply of old small Wellington boots. What is it with children and wellies? Or perhaps it’s just my children? Every time we buy a pair of wellies we try to buy a decent pair, so they don’t wear out. Then inevitably they do just that, or the children’s feet grow! Anyway, this leaves us with a fare share of wellies to recycle. What to do with them? Well, one use I’ve come up with is to use them as planters.

20130906-123158.jpg
First you need to drill drainage holes through the soles of the wellingtons. Then put some polystyrene or other crocs in the bottom to help with drainage. Fill the boots with compost and then plant your plants in the top. I’ve planted nasturtiums and marigolds this year. They need a good water and will need to be regularly watered, like all containers. But they’ll do fine!

To liven up the fence at the plot I hung the wellies on the fence panels using cup hooks. It’s always nice to be met by flowers as we enter the plot.

The Great Cucumber Monster

On a walk back from the school run one day I noticed someone had thrown out a wooden parasol. It got my attention, but I had no use for a broken sun shade. A trawl later through Pinterest (it was wet) led me to a photo of a cucumber frame made from an old parasol. Ever keen to reuse rather than recycle I returned from next morning’s school run with a broken parasol and hot-footed it over to the plot. A quarter of an hour later the allotment had its very own cucumber frame! No cucumbers, but a great piece of reclaimed garden architecture.

20130904-142340.jpg

Fired up by cucumber enthusiasm I bought seeds, sowed and raised plants to populate frame. The standard parasol has eight spurs and so I duly planted eight cucumber plants. After a few weeks the plants started to ramble up the wood and I repeatedly tied them to the spurs to tame the evergrowing eight armed cucumber monster!

20130904-142723.jpg

Eight cucumber plants produce a lot of cucumbers and nearly everyone we know now has an almost unlimited supply if cucumbers.

20130904-142854.jpg

Now to investigate cucumber recipes as there seems no end to the supply – and I’ve got another plant growing in the greenhouse!