Jerusalem Artichoke & Apple Soup

November has traditionally been a month when our allotment’s harvest is limited; although this year I seem to have succeeded in keeping the cropping season going for longer. There are brassicas ready for accompanying a hearty stew and plenty of the bright and earthy beetroot and chard. However, one crop which I always grow and often fail to take advantage of are Jerusalem artichokes. They are not artichokes like those found in delicious Italian antipasti, but those which are tubers below a sunflower type plant. Indeed the Jerusalem part of the name comes from the Italian for sunflower, Girasole, whereas the artichoke part is down to their taste being similar to globe artichokes. Whatever their origins they are one of the easiest plants to grow; planted as tubers in spring, they grow up to 2m in height with small sunflowers on top. The tubers can be dug from September, and as long as you don’t dig out all the tubers (it’s almost impossible to find every one), they’ll come back year after year to provide you with colour and a great screening plant.

In terms of flavour they are similar to the globe artichoke, but nuttier, and apparently are one of the best non-meat sources of iron. We’ve made a delicious gratin of Jerusalem artichokes in the past, but a the weather was cold I decided on a soup and teamed the nutty artichokes with sharp apples to make a velvety soup.

20131125-110638.jpg

What you will need
1 tbsp  lemon juice
450 g  Jerusalem artichokes
3 tbsp  butter
1 onion, chopped
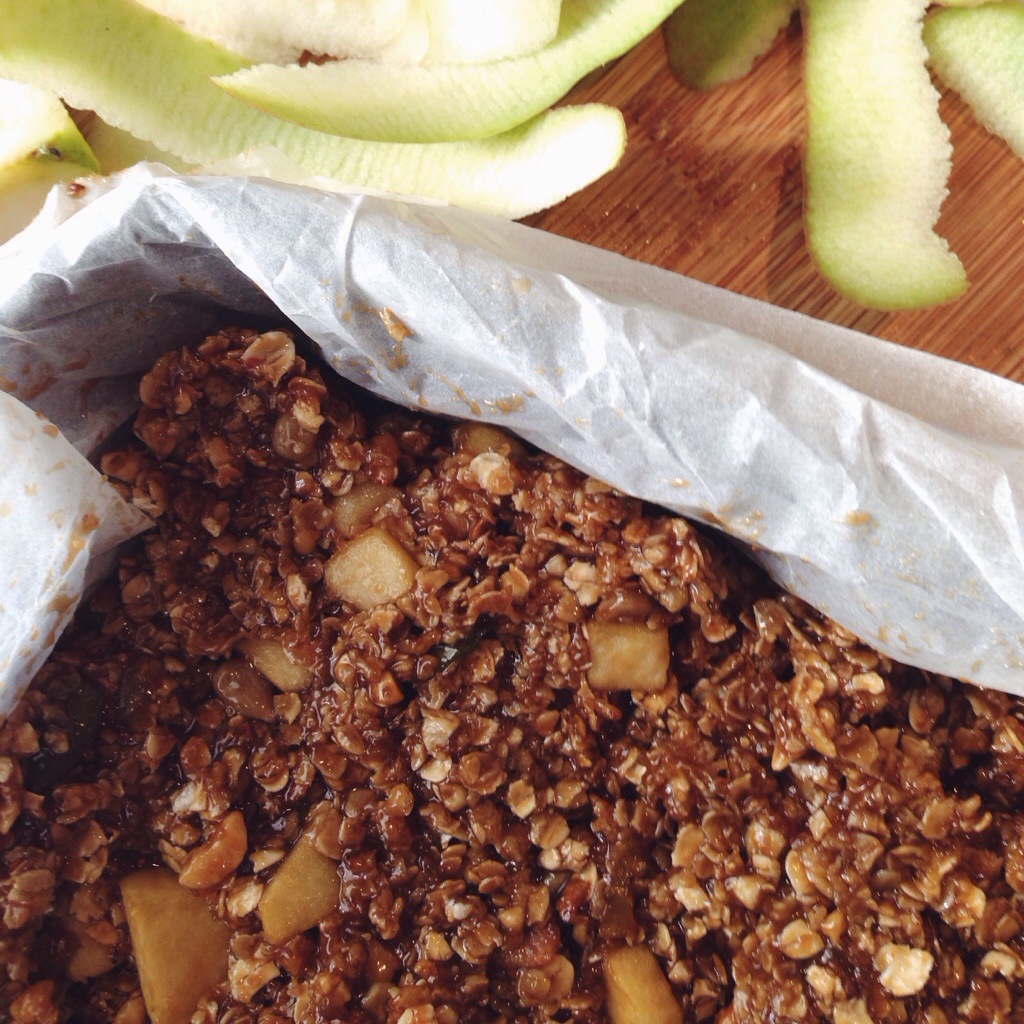
4 apples, peeled, cored and sliced
1 tsp  salt
1/4 tsp  white pepper
500 ml chicken stock
Chopped chives to garnish

Jerusalem artichokes are usually pretty knobbly, but this year they seem to have grown quite smooth. Even so, they need to be peeled and sliced and then put into a bowl of acidulated water (1 tbsp. of lemon juice in a pint of water) to maintain their creamy white colour. Meanwhile, gently sweat the onion in the butter until it is soft and translucent, at which point add the sliced artichokes (retaining the lemon water for use later). Cook for a few minutes before adding the apple, salt and pepper. After a further five minutes add a little of the lemon water and the chicken stock and simmer until the artichokes are soft. Blend the mix into a smooth soup, adjust the seasoning and serve with a garnish of chopped chives.

Autumn Fruit and Chestnut Frangipane Tarts

One of the things I love to do is collect chestnuts from the countryside. We forage around under the sweet chestnut tree, and on finding the glossy brown nuts, break open the shells to get at the sweet nuts. I’ve noticed them piled high outside our local grocers too – for those times when I can’t forage for them.

20131118-113001.jpg

Although I love the nuts fresh, I wanted to use them cooked and use them to flavour a dessert. So, after roasting and peeling I whizzed them in the food processor to create a seasonal alternative to ground almonds in a frangipane. Combined with some poached winter fruits they made a sophisticated tart inspired by an Angela Hartnett recipe.

What you will need
Pastry
225g plain flour, plus extra for dusting
110g butter
110g caster sugar
3 medium egg yolks, lightly beaten
Frangipane
125g butter, softened
125g caster sugar
2 eggs
125g ground chestnuts (roasted and peeled)
1 tbsp plain flour
Poached Pears and Quince
250g caster sugar, plus 2 tsp extra
2 good-sized pears and 2 quince
1 cinnamon stick, broken in half
3 cloves
1/2 lemon
2-3 strips thickly pared orange zest
1/2 vanilla pod

First make the pastry by adding the butter, flour and sugar into the food processor until the mixture resembles breadcrumbs. Add the egg yolks into the mix slowly, until the dough comes together in a ball – you might need to add 1 teaspoon cold water if the dough is very crumbly. Wrap the dough in cling film and pop into the fridge for 30 minutes or so. To make the frangipane filling cream the butter and sugar together in a large bowl until light and fluffy (or whizz in the food processor). Gradually beat in the eggs, one at a time, then fold in the ground chestnut and flour. Mix well and chill until needed. To poach the pears and quince put the sugar in a saucepan, pour in 500ml water and place over a medium heat. Stir until the sugar has dissolved. Peel the fruit and add to the pan, along with the cinnamon. Squeeze the juice from the lemon into the pan and add the squeezed lemon and orange zest. Split the vanilla pod in half, scrape out the seeds and add to the pan with the pod. Add some more water to just cover the pears. Simmer for 25 minutes, then remove the fruit to a plate with a slotted spoon. Set aside for 15 minutes, or until cool enough to handle.

20131118-112613.jpg

Preheat the oven to 190°C/fan170°C/gas 5. On a lightly floured work surface, roll out the pastry to a circle large enough to line the tart tin. Don’t worry if it breaks up, as this is a very short, crumbly pastry – you can just patch it together in the tin , making sure it is even all over. Trim off any excess pastry and spread the frangipane evenly on top. Cut the fruit in half lengthways and, using a teaspoon, scoop out and discard the core from the centre. Cut each piece of fruit into slices and arrange on top of the frangipane filling. Bake for 55 minutes to 1 hour, until the pastry is golden and the filling is set (I made smaller tarts, so baked for a sh0rter period). Sprinkle with the extra 2 teaspoons caster sugar and bake in the oven for a further 15 minutes to finish off the browning. Cool in the tin slightly, then remove and transfer to a wire rack. Serve warm or at room temperature with a dribble of cream.

20131118-112457.jpg

Gnocchi

I love these pillow soft potato dumplings. Up until now we’ve bought them, but with some leftover mash in the fridge I decided to have a go at making them myself. Not only was it really easy, the resulting gnocchi were even better than any shop bought ones we’ve had.

20131114-125910.jpg
Like many families, we eat a lot of pasta. Not many days go by without a dish of pasta pesto, macaroni cheese, or pasta with a tomato sauce. Gnocchi gives us a different vehicle for our range of sauces. Today the gnocchi were split, with the children having them with pesto (a firm favourite with my son), and my wife and I having them combined with crown prince squash and blue cheese.
What you will need (makes enough for 4-6 people)
1kg potatoes
Salt and pepper
1 egg
250g plain flour (you may need more flour depending on the water content of the mash)
Flour for dusting.

Peel and dice the potatoes and bring to the boil, cooking until tender. Cool a little, then mash, and allow to cool completely. Combine the cooked potato with the other ingredients to form a sticky smooth dough; it is best to work the dough quickly to give the gnocchi a light structure. Sprinkle flour on a surface and roll the dough into long sausage shapes. Cut into 2cm lengths, using a fork to press the distinctive ridges in the gnocchi (the ridges allow the sauce to stick easily). If you want, you can open freeze the gnocchi at this point, cooking them straight from frozen for twice as long. To cook the dumplings, bring a saucepan of salted water to boil, drop the gnocchi in, and simmer until they all rise to the surface (about 2 mins). Take the gnocchi out if the water with a slotted spoon, drain well and add to your sauce of choice.

Crown Prince Squash, Blue Cheese Gnocchi
1 Crown Prince Squash
1 red onion (peeled and cut into 8)
3 garlic cloves
1 handful of rosemary leaves
75g blue cheese

Peel and deseed the squash, and chop it into 2cm dice. Place in a roasting tin and add the onion and garlic, as well as half of the rosemary. Roast the vegetables for 30 minutes at 180C until they are soft and slightly coloured. When the squash and onion are soft and cooked, add the remaining rosemary and the blue cheese in small chunks. Allow the cheese to melt a little, then combine with the cooked gnocchi and serve.

Arancini – worth having leftovers for!

Ever find you make too much risotto? I’ve become pretty good at portion control – enabling us to not waste too much food. We’re also good at using leftovers in other meals; leftover Hunter’s Chicken for example, makes a super sauce for pappardelle when pushed through a sieve and combined with a bit of the pasta cooking water

That said I always end up making too much risotto; the usual 500g packets provides enough rice for a couple of overly generous meals for two, but not three sensible sized meals. Luckily leftover risotto can be transformed into delicious Arancini; balls of risotto encased in crispy breadcrumbs. I like them so much I subconsciously over cater every time I make risotto. Arancini are easily made and comfortably use up any amount of leftover risotto.

20131109-152808.jpg
What you will need
Leftover risotto
Flour for dusting (seasoned with salt and pepper)
1 egg (beaten)
Breadcrumbs
Vegetable oil (or other oil suitable for deep frying)

Take your leftover risotto and form into golf ball sized balls. It helps to have wet hands to prevent the mix sticking to you. if you have some mozzarella, you can put a small piece in the centre of each ball at this point. The cheese will melt in the heat of the oil later, giving you a gooey cheesy centre. Once your rice balls are formed place them in the fridge for a few minutes to firm up. Coat the balls with breadcrumbs by rolling in the seasoned flour, then beaten egg, and finally breadcrumbs; before returning to the fridge for 30 minutes.

Heat the oil to frying temperature (a few breadcrumbs dropped into the oil should crisp in a few seconds). Lower the rice balls into the oil and cook until golden brown. I always use a saucepan, so I fry three or four balls at a time. Remove them using a slotted spoon and place on a piece of kitchen towel to absorb any excess oil. Serve warm with a tomato sauce, on their own, or cold as a great snack.

Like me you’ll be making too much risotto before you know it.

Apple Flapjack for an Allotment Bonfire Night

Our allotment site is a great slice of society. The plot is surrounded by others tended by young working families, elderly couples, the unemployed, hard worked public sector workers; people of all races and creeds. It is a great and supportive community, and last night we shared on a bonfire celebration. Allotment holders from across the site got together and sat around a raging fire enjoying the local firework display, cider made from our own apples, and pizzas cooked on the wood burning pizza oven.

Wanting to contribute something to the proceedings, I decided to create a bonfire flapjack. As we still have quite a few windfall apples I chose to flavour it with them, and use some of the pumpkin seeds and sunflower seeds I’d collected last months. I often make River Cottage Honey and Peanut Butter Booster Bars, which used to be a big hit with my former colleagues. So I used the recipe as a basis for my Bonfire Apple Flapjack. To give it a more bonfire dark stickiness, I used dark muscovado sugar, and added a combination of grated and diced apple instead of huge dried fruits.

20131104-082434.jpg
What you will need
125g unsalted butter
125g dark brown muscovado sugar
100g no-sugar-added crunchy peanut butter
75g honey, plus a little more to finish
Grated cooking apple
Finely grated zest of 1 lemon
250g porridge oats (or the equivalent weight in oats and crushed leftover cereal)
A large apple peeled, cored and diced
100g mixed seeds (I used pumpkin and sunflower)

20131102-163320.jpg
Start by greasing and lining a baking tin, about 20cm square. Put the butter, sugar, peanut butter, honey, grated lemon zest and cooking apple in a deep saucepan over a low heat. Heat until the mixture is melted, stirring occasionally. Combine the oats, diced apple and most of the seeds into the melted butter mixture and stir until it’s thoroughly combined. Spread the mixture out evenly in the baking tin, smoothing the top as you go. Finally scatter the rest of the seeds over the surface and trickle with a little more honey. At this point I tend to use the palm of my hand to press down the mix slightly.
Pop the tin in an oven preheated to 160°C/Gas Mark 3 and bake for about 30 minutes, until the flapjack is golden all over and slightly crispy on the edges. It’s really important that it is left to cool completely before turning out and cutting into squares with a sharp knife. As Hugh Fearnley-Whittingstall suggests in his original recipe; this is a tricky task, but the flapjack will cut much better if you can manage to hang on before devouring. The crispy oats contrast well with the soft sweet apples, and the muscovado sugar hints of toffee apples on a cold afternoon. A perfect treat to munch whilst watching fireworks and watching the dancing flames of a bonfire.

20131103-093237.jpg

Hugs and Biscuits

“Can I give you a big hug?” asked my son the other day. “Of course” I replied. A hug is something we all need now and again. I love how children, naturally more uninhibited, will just ask for a hug, or in my son’s case just offer one. The feeling of being embraced is often all that is needed to solve a problem, or to change one’s mood.

Last week, the children and I ended up getting a coffee and biscuit in the great Caffé Bar Italia di Napoli down the road. I’ve never been to Italy, but it strikes me that this cafe is pretty much as the cafés of Naples (the proprietor’s home town) are like. The coffee is good and the range if biscuits and antipasti super. To accompany our drinks we had some small biscuits which were half chocolate and half vanilla. Deliciously crisp and crumbly, yet not overly sweet, they’re called Abracci. The name translates as ‘hug’, and the vanilla and chocolate halves clasp each other as if they are hugging.

Having looked online, I found a number of recipes (including a recipe from the commercial makers Mulina Bianco) and tracked down what seems like a key ingredient; potato starch, which helps the dough to keep its shape when baking, and maintains the ‘hug’. Whether they are served with a coffee or tea, they are a delicious light biscuit and like a hug bring a smile to your face.

Abracci (makes 72 biscuits)

What you will need
Cream dough:
200g flour
50g potato starch
100g of sugar
50g of butter
45g of margarine
3 tablespoons of fresh cream
1 tablespoon of honey
Knife tip of vanilla bean paste
1/2 teaspoon of baking powder
pinch of salt

Cocoa dough: 
200g flour
50g potato starch
120g of sugar
40g of margarine
60g of butter
30g cocoa powder
40g of fresh milk
1 egg
1/2 teaspoon of baking powder
pinch of salt.

You need to prepare the two flavoured doughs, then combine before baking. First mix the margarine, butter and sugar until creamy. When light and fluffy, add the cream, vanilla and the honey and mix thoroughly. Finally fold in the flour, potato starch, salt and the baking powder, mixing until all the ingredients are thoroughly combined in a dough.  For the cocoa dough, repeat the process of creaming the butter, margarine and sugar, before adding the milk and egg. Fold in the remaining dry ingredients to make a dough. Allow the dough to rest in the fridge for 30 minutes.

20131022-210117.jpg
Take the dough from the fridge and roll to form 30cm sausages. Divide each sausage into 3cm pieces and then combine one cocoa and one cream sausage to form the ‘hug’ shape shown in the photo above. Bake at 180 ° C for 10-15 minutes. The biscuits are ready when the cream part has started to turn golden brown.

20131023-105502.jpg

Cheesy Feet

For quite a while now we have made cheese biscuits based on a River Cottage recipe (adapted below). Biscuits are always popular in our house, and in making cheese ones we hope to reduce our sweet intake a little. The idea of adapting the idea to create ‘cheesy feet’ came from a trip to Bradford on Avon – where (in desperate need of a snack) we bought some cheesy feet from the baker at the weekly Farmers’ Market. For months we’ve looked out for a foot cutter to create our own version, finally finding one the other week.

With Halloween coming up, the children and I decided to make some cheesy feet with added gruesomeness – hence the addition of dodgy looking nails in the form of pistachios. You could use flaked almonds, but the green and brown tinge to pistachios seemed to fit the Halloween theme best.

20131024-140636.jpg
What you will need (Makes 20-24)
125g unsalted butter, cubed
125g cheddar, grated
4 tbsp grated parmesan
150g plain flour
½ tsp bicarbonate of soda
A pinch of salt
2 tsp yogurt
A few grinds of black pepper
Pistachio nuts – halved

This is a really easy recipe, as all you need to do is whizz everything in a food processor until it comes together into a ball, then remove the dough and knead for a minute or so. Wrap the dough in clingfilm and pop it in the fridge for half an hour. Preheat the oven to 190C/375F/gas mark 5.

20131024-140922.jpg
Roll out the dough on a lightly floured surface until it’s about 3-4mm thick, then use your foot cutter (or any other shape you want) to cut out the biscuits. Place five of the halved pistachios on each foot to resemble nails, then move the biscuits onto baking sheets lined with baking parchment and bake for 10 minutes, until golden. Cool on a wire rack.

Rocket Pesto – A Guest Post from Little Button Diaries

I’m really excited to have a guest post from Brighton baking, making and baby bloggers, Little Button Diaries. They’ve been a huge influence on this new blog, and ignited my inner crafter as well. Here’s their post, and a great use of the rocket at the allotment.

Homemade Rocket Pesto

I’m always looking for inspiration for new ways to get creative in the kitchen utilising the fruit and veg I get from my garden. Simon’s blog is one of my bookmarked blog for it’s inspiring kitchen ideas and gardening tips and so I’m really happy he asked Little Button Diaries to write a guest post.

I have the smallest postage stamp of a garden, but despite its size I’m living proof that you don’t need a vast space to grow your own vegetables. I’m a big fan of growing things in tubs and pots and this year I decided to grow some rocket in a rusty old supermarket basket I found in my Gran’s garage (good stealing Gran!). As a pretty solid weed, it took over in abundance and I was left wondering what I could do with mountains of rocket – as it has definitely got too cold for salads now. I decided to make rocket pesto, which is actually a good peppery alternative to the basil version. Its also very very easy!

image

What you will need
A good bunch (about 50g) of rocket leaves
1 clove of garlic
salt
Juice from half a lemon
25g lightly toasted pine nuts
25g parmesan
125ml olive oil

Begin by putting the garlic, salt and nuts into a blender and pulse until finely chopped – don’t blend for too long or it will start to turn to a paste. Remove from the blender and do the same for the rocket leaves and lemon juice, with a small dash of the oil. Then remove and combine the nuts and rocket with the remaining oil, mixing well.

image

This is can then be stored in the fridge and used in just the same way as basil pesto. I mixed mine into some cooked penne, grated on some cheese and breadcrumbs and gave it a blast in a hot oven. Very tasty it was too.

Hunter's Chicken (Pollo alla Cacciatora)

I’m writing this as the skies darken in the late afternoon and outside there is a distinct nip in the air. Not that looking in the greenhouse would reveal the autumnal weather, with all the tomato plants still fruiting, and even flowering. This has been the first year we have really managed to successfully grow tomatoes, not least because its the first year we have had a greenhouse at the plot. Our four plants have kept us in tomatoes for most of the late summer and continue to do so with gusto. So, most meals now seem to have some tomato content. Yesterday’s meal was a recent discovery, and a perfect dish for a chilly autumnal evening. Hunter’s Chicken (Pollo alla Cacciatora), is a traditional Italian dish, cooked and eaten by many families, and as such has many variants depending on what was hunted to go in it. Like Felicity Cloake (whose recipe I based mine on), I reckon rabbit was probably the meat of choice, but chicken legs with their juicy dark meat is what I used.

20131021-113018.jpgWhat you will need(Serves 4) Knob of butter 2 tbsp olive oil 4 chicken legs, divided into thighs and drumsticks. Seasoned flour, to dust 2 heads of garlic, cut horizontally Small bunch of rosemary 1 carrot, peeled and diced 1 stick of celery, diced 1 anchovy fillet (chopped) Half a glass of white wine 250ml decent chicken stock If like me you have a glut to use up, 150g really ripe fresh tomatoes, skinned and chopped (or an equivalent amount of plum tomatoes in juice) 250g quick cook polenta Knob of butter 50g Parmesan Heat the butter and oil in a large, heavy-based casserole dish over a medium-high heat. Next dust the chicken pieces in the seasoned flour, then fry them in batches until golden brown on all sides. Take the chicken out of the pan and set aside. Slowly fry the garlic, rosemary, carrot and celery, until it is softened and started to colour. Pour in the wine and use a spoon to scrape the deliciously crispy bits off the bottom of the pan as the liquid reduces. Add the stock and tomatoes, and return the chicken to the pan. Bring to a simmer, cover, turn down the heat and cook gently for 45 minutes, until the meat is falling from the bone.

I served the chicken with polenta (a staple of northern Italy), which I made using the instructions on the packet and added parmesan and butter before serving.

Penne with Cime di Rapa

The Cime di Rapa on the plot has reached maturity and I’ve begun to harvest the quick growing brassica. One of the classic dishes of Puglia is Orichiette con Cime di Rapa and to me it seemed a good plan to start eating the Cime di Rapa in this classic Italian pasta dish.

Looking online (as I tend to do to get ideas for meals) I found that, although the basic recipe was the same, there was quite a bit of variation in ingredients to accompany the Cime di Rapa. Some included cherry tomatoes, and the plot has a surfeit of them at the moment, so I included them. So I ended up with my own version of the dish, which I hope has some authenticity to it.

20131021-164919.jpg

What you will need (serves 2)
200g Penne (we had Penne in the cupboard, so used this instead of the classic Orichiette)
100g Cime di Rapa (trimmed to include thinner stalks and the floriferous heads)
3 anchovies (finely chopped)
10 cherry tomatoes (cut into halves)
1 clove of garlic (finely chopped)
Small pinch of chilli flakes
Handful of chopped parsley and grated Parmesan to finish the dish.

Bring a saucepan of salted water to the boil and cook the pasta (adding the Cime di Rapa after the first five minutes). Cook the penne until al dente, draining and retaining a small amount of the pasta water. As the pasta cooks fry the garlic, chilli flakes, anchovies and the chopped tomatoes. Once the pasta is drained, add to the sauce and toss to thoroughly mix. At this point I added a little of the pasta cooking water to bring the sauce together, then stirred in the Parmesan and parsley before serving.